THE CANNABIS THREAD 101!!

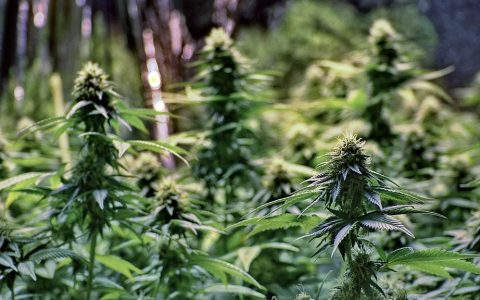
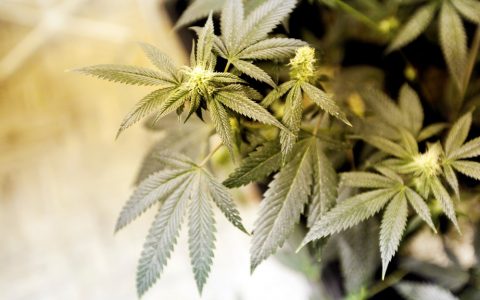
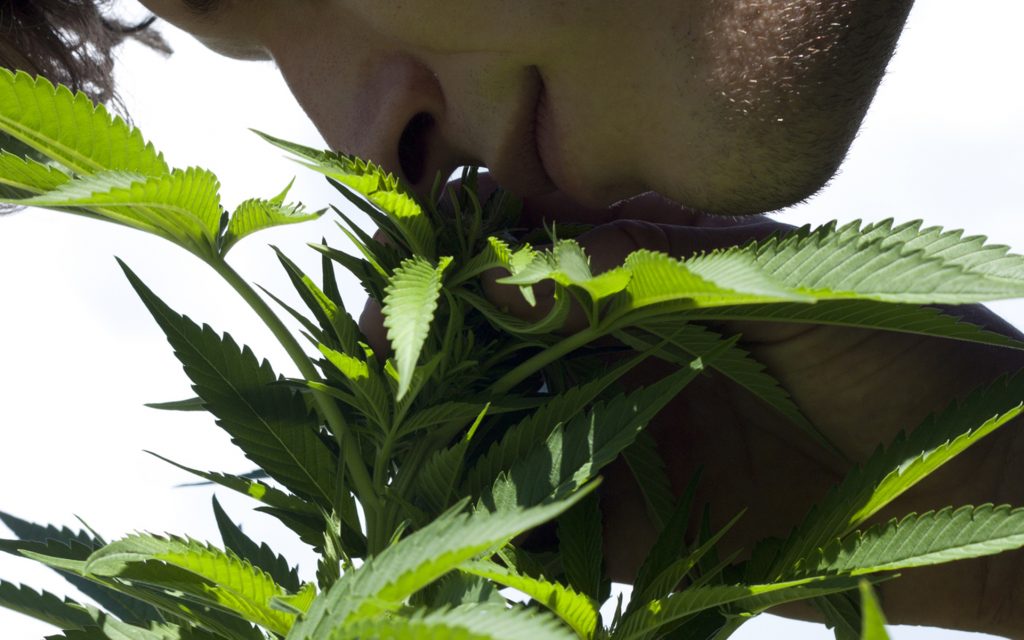
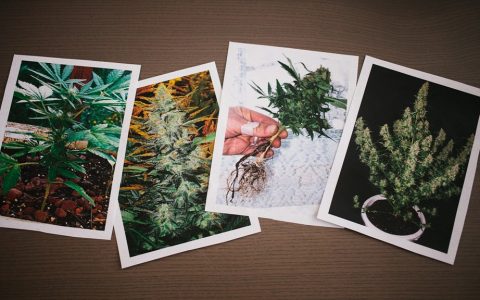
Ingest or Inhale? 5 Differences Between Cannabis Edibles and Flowers

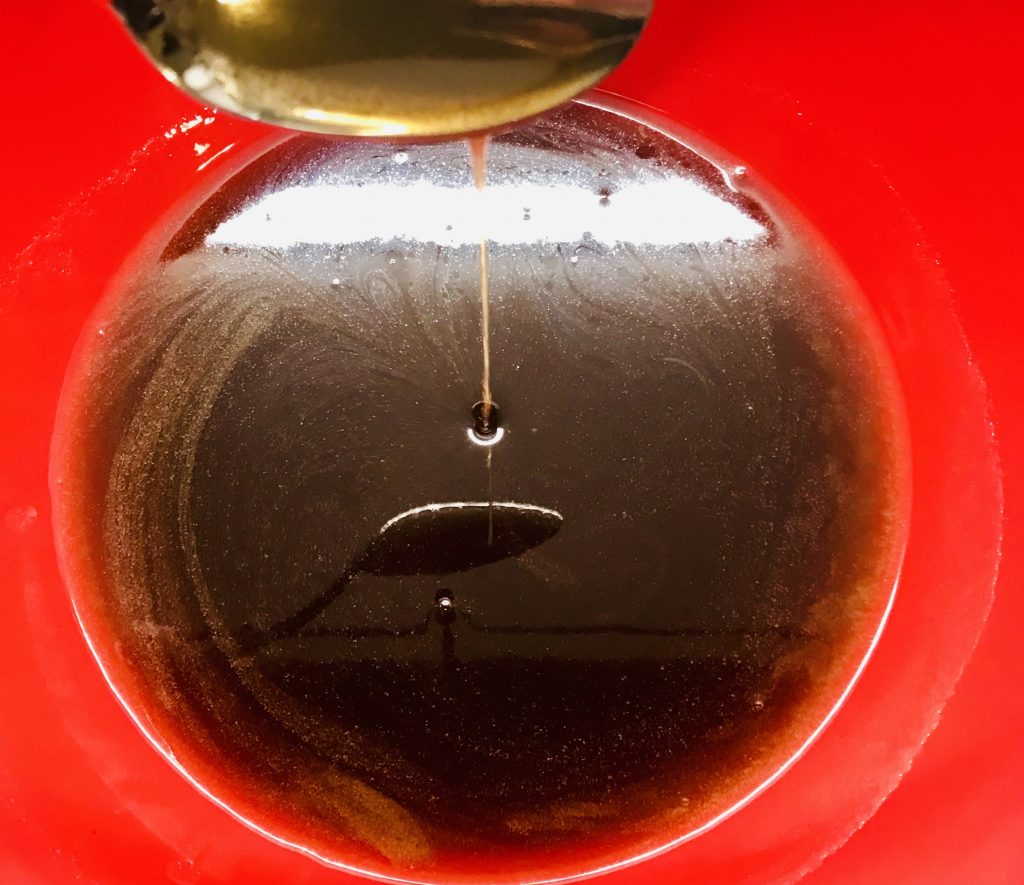
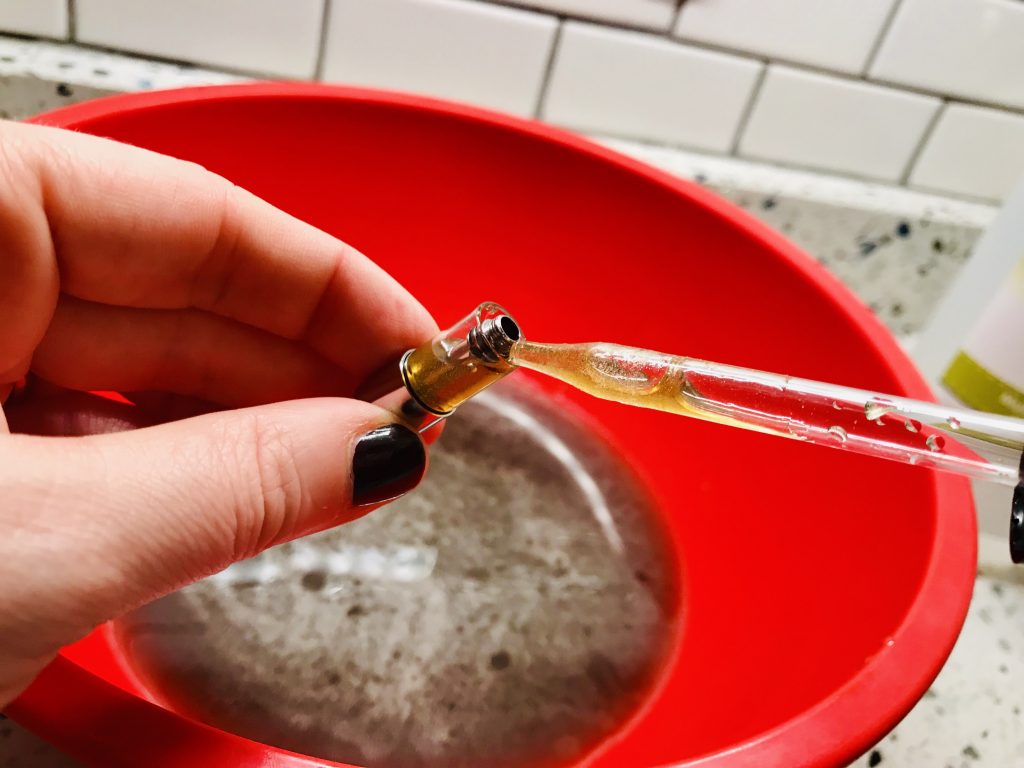
Muffins, candies, hummus, bacon, tea, pizza, guacamole, vegetable medley…the virtually endless list of cannabis-infused foods opens up fascinating possibilities for the adventurous consumer. As you venture deeper into the exciting world of marijuana, you may find yourself wondering what to expect from these edibles. Maybe you’ve already given them a go and are wondering why they induce that intense, almost psychedelic high that lasts so long. Speculate no longer, curious ones: we’re going to break down the differences between psychoactive snacks and the more familiar inhaled forms of cannabis.


1. THC Is Absorbed Differently
Why are marijuana-infused edibles typically so much stronger than smoked or vaporized cannabis? When you consume cannabis in an ingestible form, its THC is metabolized by the liver, which converts it to 11-hydroxy-THC. This active metabolite is particularly effective in crossing the blood-brain barrier, resulting in a more intense high. Inhaled THC undergoes a different metabolic process because rather than passing through the stomach and then the liver, the THC travels directly to the brain. This is why the effects of smoked or vaporized cannabis come on faster and diminish quickly.

2. Effects and Duration
The Golden Rule of edibles: start small and be patient. Because of the way edibles are metabolized, it can take anywhere from 30 minutes to 2 hours to kick in, and the effects can last several hours. These effects vary between edibles, but generally, consumers report stronger body effects coupled with an almost psychedelic head high in large doses. Smaller amounts yield milder and arguably more comfortable effects, which is why we reiterate: start small and be patient.


Edibles may be strong, but compared to inhaled cannabis, they actually deliver a smaller concentration of cannabinoids to the bloodstream. Ingesting edibles introduces only 10 to 20 percent of THC and other cannabinoids to the blood plasma, whereas inhaled cannabis falls closer to 50 or 60 percent. The effects of smoked cannabis tend to peak within the first 10 minutes and rapidly dissipate over the next 30 to 60 minutes.

3. Edibles Are More Difficult to Dose
Determining the THC content of a homemade batch of edibles is no easy feat, and even professional distributors sometimes have difficulty capturing the advertised dose in their products. Because of the delay between ingestion and onset of effects, consumers may sometimes overestimate the dose. Inhaled cannabis, with its instantaneous effects, allows the consumer to gradually dose as needed.


In legal markets, 10 milligrams of THC is considered a “standard” dose that normally delivers mild effects. A 100mg edible is considered much (much, much) more potent and should be split into several doses over time. Colossal amounts of THC won’t kill you, but trust us: you will enjoy the next several hours of your life more if you dose responsibly and patiently.

4. Disparities in Advertised Potency
In unregulated markets without meticulous testing, it’s possible that an edible’s potency does not match the label. Keep in mind that your go-to distributor may have a batch that varies from the last one you tried, so if you think, “The last time I tried this, it was fairly weak, so this time I’ll eat twice as much,” you may find out the hard way that this latest batch is a lot stronger than what you expect.

Legal cannabis systems are moving toward stricter regulations for edible testing and THC content maximums, but if you’re living in a state without these guidelines in place, be sure to ease into your edible expedition slowly and cautiously until regulations and testing pave the way for consistency and accurate labeling.


5. Edibles as a Healthier Alternative to Smoking
Many people become interested in edibles because they don’t enjoy the harsh experience of smoking or are worried about the long-term health concerns associated with it. Vaporization is another health-conscious alternative commonly recommended, but edibles can oftentimes provide longer lasting relief to chronic symptoms like pain, often making them a preferred choice for medical patients.

Edible recipes don’t always have to consist of the stereotypical pot brownie or a sugary sweet treat; nowadays, you can transform most dishes into a cannabis-infused concoction. Try some cannabis-infused granola or quinoa salad, or make your own cannabis butter and douse your kale chips with it if that’s what you’re into. We don’t care, as long as you stay cautious and remember our parent-y voice in your head when it comes time for feasting.

Image credit: Niharb via Photopin cc

EDIBLES
 
Five star thread. Excellent information. Our people need to get in on this industry. We’ve basically popularized cannabis culture for the last 60 years.

You aint kidding!! The way I see it.. Instead of standing in line to get the cannabis, grow the cannabis and have other people standing in line!! Maybe, Im looking at it all ass backwards...
 
5 High-Yielding Strains for Your Cannabis Garden

high-yield-cannabis-strains-1024x640.jpg

When cultivating cannabis, growers aim to produce a potent, fragrant bud–and ideally, lots of it. Genetics, nutrients, grow mediums, climate, and many other factors are responsible for determining the yield of your garden. The first of those factors, the plant’s genetics, dictate which attributes the plant is capable of expressing, while environmental factors are what help coax them out in the growing process.


Below are five strains with genetics that predispose them to heavy yields. Consider sowing these strains if you’re looking to achieve a bigger harvest this year.


White Widow
White Widow is a famous Amsterdam hybrid that was created by crossing landrace strains from Southern India and Brazil. Now famous worldwide, White Widow is known for its impressive resin production and powerful euphoria. Consumers may celebrate its effects, but growers celebrate White Widow’s large yields.

There’s a reason why this award-winning hybrid remains popular since its birth in the 90s. Not only is this strain a heavy yielder, White Widow is resilient toward mold and pests, and flowering wraps up in just eight to nine weeks. White Widow fares best in indoor gardens, so find some seeds and watch this plant take off.


Cheese Quake
Cheese Quake combines the power of a quality strain with high yields. Created by TGA Subcool Seeds, this indica-dominant hybrid combines genetics from Cheese and Querkle. Its effects strike a balance between cerebral and physical, elevating the mind while saddling the body with relief. The aroma is sour and funky like cheese, with sweet fruity undertones.

Generally grown indoors, Cheese Quake will grow fast and big. Top this plant early on in vegetation to help it grow into a bushy shape. Low stress training (LST) and pruning will help keep this plant headed towards an epic yield of quality buds.


Purple Trainwreck
Another outdoor California classic, Purple Trainwreck is famous for its high yields and ease of growing. This strain was created by the Humboldt Seed Organization by crossing the longtime favorite Trainwreck with Mendocino Purps. The resulting hybrid holds onto both Trainwreck’s wonderful aroma and effects and Mendo Purp’s weight and resilience. Purple Trainwreck offers a euphoric and uplifting high, making it a perfect strain for entry-level consumers looking for a mellow experience.

This strain will thrive either indoors or outdoors, with a favorable flowering time of just eight weeks. For this reason, Purple Trainwreck is a hit for light-deprivation greenhouses or growers looking to harvest early in the fall.

Critical Kush
Critical Kush was created by breeding two legendary strains, Critical Mass and OG Kush. Its parent strain Critical Mass is known for its sweet citrus flavor while OG Kush brings to the table earthy flavors and potency. With their forces combined, Critical Kush inherits potency, flavor, and heavy yields.

Any moisture influx will cause Critical Kush’s buds to mold from the inside out, which is why this strain needs to be grown in a space where humidity can be precisely regulated. For this reason, growing indoors or in a greenhouse is recommended. Heavy feeding is necessary to ensure the buds grow dense, healthy, and heavy.


Blue Dream
Blue Dream is regarded as the most popular strain in the United States. This hybrid is heavy-yielding, mildew-resistant, flavorful, easy to find, and calming in effects. Due to its overwhelming presence and pacifying, mellow euphoria, Blue Dream is popular among novice consumers. However, many connoisseurs and heavy consumers have moved past the Blue Dream hype.

Having been bred for outdoor farming in California, Blue Dream reaches its full potential under the sun. It responds well to a Mediterranean climate and takes off vertically. Blue Dream grows lanky and tall, but produces dense buds which help to make its yields exceptional.


The quality of Blue Dream varies widely depending on how it was grown, hence why so many connoisseurs steer toward other genetics. As a popular high-yielding strain, many cultivators grow Blue Dream as a cash crop without putting enough attention towards the quality of the product. Try finding a quality Blue Dream and see if this changes your opinion.

While this is a short list of popular, high-yielding strains, there are so many others out there begging to be discovered, grown, and celebrated. As farming tactics and technology improve, yields will continue to increase. But don’t forget that behind any high-yielding crop is a capable farmer who pays attention to his or her plant’s needs.
 
Stages of the Cannabis Plant Growth Cycle

Stages-of-growth-header-1024x640.png

Cannabis plants, like all living things, go through a series of stages as they grow and mature. If you’re interested in cultivating cannabis, it’s especially important to understand the changes a plant undergoes during its life cycle, as each stage of growth requires different care.


Different stages call for different amounts of light, nutrients, and water. They also help us decide when to prune and train the plants. Determining a plant’s sex and overall health rely on stages of growth as well.

The life cycle of cannabis can be broken down into four primary stages from seed to harvest:

  • Germination
  • Seedling
  • Vegetative
  • Flowering


Seed Germination (5-10 Days)
Light Cycle: 18 hours of light

seed_germination-768x1024.png

(Elysse Feigenblatt/Leafly)
The first stage of life for a cannabis plant begins with the seed. At this point, your cannabis plant is dormant, patiently waiting for water to bring it to life.

You can observe the quality of the seed by its color and texture. The seed should feel hard and dry, and be light- to dark-brown in color. An undeveloped seed is generally squishy and green or white in color and likely won’t germinate.


To begin growing from a seed, learn more about germination here. This stage can take anywhere between 5-10 days.

Once your seed has popped, it’s ready to be placed in its growing medium. The tap root will drive down while the stem of the seedling will grow upward. Two rounded cotyledon leaves will grow out from the stem as the plant unfolds from the protective casing of the seed. These initial leaves are responsible for taking in sunlight needed for the plant to become healthy and stable.

As the roots develop, you will begin to see the first iconic fan leaves grow, at which point your cannabis plant can be considered a seedling.

Seedling Stage (2-3 weeks)
Light Cycle: 18 hours of light

seedling-768x1024.png

(Elysse Feigenblatt/Leafly)
When your plant becomes a seedling, you’ll notice it developing more of the traditional cannabis leaves. As a sprout, the seed will initially produce leaves with only one ridged blade. Once new growth develops, the leaves will develop more blades (1, 3, 5, 7, etc.). A mature cannabis plant will have between 5-7 blades per leaf, but some plants may have more.


Cannabis plants are considered seedlings until they begin to develop leaves with the full number of blades on new fan leaves. A healthy seedling should be a vibrant green color. Be very careful to not overwater the plant in its seedling stage—its roots are so small, it doesn’t need much water to thrive.

At this stage, the plant is vulnerable to disease and mold. Keep its environment clean and monitor excess moisture.

Vegetative Stage (3-16 weeks)
Light Cycle: 18 hours of light

vegetative_stage-768x1024.png

(Elysse Feigenblatt/Leafly)

The vegetative stage of cannabis is where the plant’s growth truly takes off. At this point, you’ve transplanted your plant into a larger pot, and the roots and foliage are developing rapidly. This is also the time to begin topping or training your plants.

Spacing between the nodes should represent the type of cannabis you are growing. Indica plants tend to be short and dense, while sativas grow lanky and more open in foliage.

Be mindful to increase your watering as the plant develops. When it’s young, your plant will need water close to the stalk, but as it grows the roots will also grow outward, so start watering further away from the stalk so the roots can stretch out and absorb water more efficiently.


Vegetative plants appreciate healthy soil with nutrients. Feed them with a higher level of nitrogen at this stage.

Flowering Stage (8-11 weeks)
Light Cycle: 12 hours of light

flowering_stage-768x1024.png

(Elysse Feigenblatt/Leafly)

The flowering stage is the final stage of growth for a cannabis plant. Flowering occurs naturally when the plant receives less than 12 hours of light a day as the summer days shorten, or as the indoor light cycle is shortened. It is in this stage that resinous buds develop and your hard work will be realized.

If you need to determine the sex of your plants (to discard the males), they will start showing their sex organs a couple weeks into the flowering stage. It’s imperative to separate the males so they don’t pollenate the flowering females.


There are a number of changes to consider once your plant goes from its vegetative stage to flowering:

  • Your plants shouldn’t be pruned after three weeks into the flowering stage, as it can upset the hormones of the plant.
  • Plants should be trellised so that buds will be supported as they develop.
  • Consider feeding plants with blooming nutrients.
Once the buds have reached full maturation, it’s time to harvest.
 
How to Grow Marijuana Indoors: A Beginner’s Guide

how-to-grow-cannabis-indoors-beginners-guide-1024x640.jpg

(Colton McMurray for Leafly)
Congratulations, you’re interested in growing your own cannabis plants for the first time! But before you flex that green thumb of yours, understand that growing marijuana indoors presents a unique set of challenges for the new hobbyist, and the sheer volume of information available on the subject can be overwhelming.


Our guide to indoor cannabis growing will help simplify the process for you into clear, easy-to-digest sections designed to help the first-time grower get started.


Step 1: Designate a Cannabis Grow ‘Room’ or Space
P3r2zIPSV25XtMPJqK5L_indoor-cannabis-grow-space.jpg


The first step in setting up your personal cannabis grow is creating a suitable space in which to do it. This space doesn’t need to be the typical grow “room; it can be in a closet, tent, cabinet, spare room, or a corner in an unfinished basement. Just keep in mind that you’ll need to tailor your equipment (and plants) to fit the space.


Start Small…
When tackling your first grow project, you’ll want to start small for multiple reasons:

  • The smaller the grow, the less expensive it is to set up
  • It’s much easier to monitor a few plants than a large number
  • Your mistakes as a first-time grower will be less costly
Remember, most new cannabis growers will experience setbacks and lose plants to pests or disease. A failed grow of two plants will put a far smaller dent in your wallet than 15 plants.

…But Think Big
When designing your space, you’ll need to take into account not only the amount of room your plants will need, but also your lights, ducting, fans, and other equipment, as well as leaving enough room for you to work. Cannabis plants can double, even triple in size in the early stage of flowering, so make sure you have adequate head space!

If your grow room is a cabinet, tent, or closet, you can simply open it up and remove the plants to work on them; otherwise, you’ll need to make sure you leave yourself some elbow room.

Cleanliness Is Crucial
Make sure your space is easily sanitized; cleanliness is important when growing indoors, so easy-to-clean surfaces are a must. Carpeting, drapes, and raw wood are all difficult to clean, so avoid these materials if possible.

Keep It Light-Tight
Another crucial criterion for a grow room is that it be light-tight. Light leaks during dark periods will confuse your plants and can cause them to produce male flowers.

Other Variables
When deciding where to grow your cannabis, keep the following variables in mind:

  • Convenience: You’ll need to monitor your plants carefully. Checking on them every day is important, and beginners will want to check in several times per day until they have everything dialed in. If your room is hard to access, this crucial step will be difficult.
  • Temperature and Humidity Concerns: If your grow space is already very warm or very humid, you’ll have issues controlling your grow environment. Choosing a cool, dry area with ready access to fresh air from the outdoors is highly recommended.
  • Stealth: You’ll most likely want to conceal your grow from nosy neighbors and potential thieves, so be sure to pick a place where noisy fans won’t garner any unwanted attention.
Step 2: Choose Your Cannabis Grow Lights
NggqCrO5T1WMrBQ3MQym_cannabis-plants-under-grow-lights.jpg


The quality of light in your grow room will be the number one environmental factor in the quality and quantity of your cannabis yields, so it’s a good idea to choose the best lighting setup you can afford. Here’s a brief rundown of the most popular types of cannabis grow lights used for indoor growing.

HID Grow Lights
HID (high intensity discharge) lights are the industry standard, widely used for their combination of output, efficiency, and value. They cost a bit more than incandescent or fluorescent fixtures, but produce far more light per unit of electricity used. Conversely, they are not as efficient as LED lighting, but they cost as little as one-tenth as much for comparable units.

The two main types of HID lamp used for growing are:

  • Metal halide (MH), which produce light that is blue-ish white and are generally used during vegetative growth
  • High pressure sodium (HPS), which produce light that is more on the red-orange end of the spectrum and are used during the flowering stage
In addition to bulbs, HID lighting setups require a ballast and hood/reflector for each light. Some ballasts are designed for use with either MH or HPS lamps, while many newer designs will run both.

If you can’t afford both MH and HPS bulbs, start with HPS as they deliver more light per watt. Magnetic ballasts are cheaper than digital ballasts, but run hotter, are less efficient, and harder on your bulbs. Digital ballasts are generally a better option, but are more expensive. Beware of cheap digital ballasts, as they are often not well shielded and can create electromagnetic interference that will affect radio and WiFi signals.

Unless you’re growing in a large, open space with a lot of ventilation, you’ll need air-cooled reflector hoods to mount your lamps in, as HID bulbs produce a lot of heat. This requires ducting and exhaust fans, which will increase your initial cost but make controlling the temperature in your grow room much easier.

Fluorescent Grow Lights
Fluorescent light fixtures, particularly those using high-output (HO) T5 bulbs, are quite popular with small scale hobby growers for the following reasons:

  • They tend to be cheaper to set up, as reflector, ballast, and bulbs are included in a single package
  • They don’t require a cooling system since they don’t generate near the amount of heat that HID setups do
The main drawback is that fluorescent lights are less efficient, generating about 20-30% less light per watt of electricity used. Space is another concern, as it would require approximately 19 four-foot long T5 HO bulbs to equal the output of a single 600 watt HPS bulb.

LED Grow Lights
Light emitting diode (LED) technology has been around for a while, but only recently has it been adapted to create super efficient light fixtures for indoor growing. The main drawback to LED grow lights is their cost: well designed fixtures can cost 10 times what a comparable HID setup would. The benefits are that LEDs last much longer, use far less electricity, create less heat, and the best designs generate a fuller spectrum of light, which can lead to bigger yields and better quality.

Unfortunately, there are many shoddy LED lights being produced and marketed towards growers, so do some research and read product reviews before laying down your hard-earned cash.

Induction Grow Lights
Induction lamps, otherwise known as electrodeless fluorescent lamps, are another old technology that has been recently adapted to suit the needs of indoor growers. Invented by Nikola Tesla in the late 1800s, the induction lamp is essentially a more efficient, longer-lasting version of the fluorescent bulb. The main drawback of these fixtures is their price and availability.

Step 3: Give Your Cannabis Plants Air
b54gwQEaTDuP1kOsEKPw_cannabis-plants-with-fan.jpg


Plants need fresh air to thrive, and carbon dioxide (CO2) is essential to the process of photosynthesis. This means you will need a steady stream of air flowing through your grow room, easily achieved by means of an exhaust fan placed near the top of the room to remove the warmer air, and a filtered air inlet on the opposite side near the floor.

You’ll need to ensure that temperatures remain within a comfortable range for your plants, between 70 degrees F and 85 degrees F when lights are on and between 58 degrees F and 70 degrees F when they are off. Some varieties of cannabis (generally indica strains) prefer the lower side of the range, while others are more tolerant of higher temperatures.

The size of your exhaust fan will depend on the size of your grow space and amount of heat generated by your lighting system. HID systems put out a ton of heat, especially if they aren’t mounted in air-cooled hoods. People who live in warmer regions will often run their lights at night in an effort to keep temperatures in their grow down.

It’s advisable to set up your lights, turn them on for a while, and then determine how much airflow you’ll need to maintain a comfortable temperature for your plants. This will allow you to choose an exhaust fan suitable for your needs. If the odor of cannabis plants in bloom will cause you problems, add a charcoal filter to your exhaust fan.

Alternately, you can create a sealed, artificial environment by using an air conditioner, dehumidifier, and supplemental CO2 system, but this is quite expensive and not recommended for the first-time grower.

Finally, it’s a good idea to have a constant light breeze in your grow room as this strengthens your plants’ stems and creates a less hospitable environment for mold and flying pests. A wall-mounted circulating fan works well for this purpose — just don’t point it directly at your plants, because that can cause windburn.

Step 4: Pick Your Controls and Monitoring
fbxWUfCzQ7WR84uvgjtv_indoor-cannabis-grow-setup.jpg


Once you have selected your lights and climate control equipment, you’ll want to automate their functions. While there are sophisticated (and expensive) units available that control lights, temperature, humidity, and CO2 levels, the beginner will generally need a simple 24 hour timer for the light and an adjustable thermostat switch for the exhaust fan.

The timing of the light/dark cycle is very important when growing cannabis; generally you will have your lights on for 16-20 hours per 24 hour period while the plants are in vegetative growth, then switch to 12 hours of light per 24 when you want them to bloom. You need your lights to turn on and off at the same times every day or you risk stressing your plants, so a timer is essential. You can use a timer for your exhaust fan as well, but spending a few extra dollars on a thermostat switch is a much better option.

With the most basic models, you simply set the thermostat on the device to the maximum desired temperature for your space and plug your exhaust fan into it. Once the temperature rises to the level you set, it will turn the fan on until temperatures fall a few degrees below the set threshold. This saves energy and maintains a steady temperature.

Since you’re probably not spending most of your time in your grow space, a combination hygrometer/thermostat with high/low memory feature can be very handy in keeping tabs on conditions in your room. These small, inexpensive devices not only show you the current temperature and humidity level, but the highest and lowest readings for the period of time since you last checked.

It’s also a good idea to keep a pH meter or test kit on hand so you can check the pH level of your water, nutrient solution, or soil. Cannabis prefers a pH between 6 and 7 in soil, and between 5.5 and 6.5 in hydroponic media. Letting the pH get out of this range can lead to nutrient lockout, meaning your plants are unable to absorb the nutrients they need, so be sure to test your water and soil regularly and make sure the nutrient mix you are feeding your plants falls within the desired range.


Step 5: Decide on a Cannabis Grow Medium
Growing indoors means you have many different methods to choose from, and whether it’s good old fashioned pots full of soil or a rockwool slab in a hydroponic tray, every medium has its benefits and drawbacks. Here we’ll examine the two most popular methods and the media they employ.

Soil
Soil is the most traditional medium for growing cannabis indoors, as well as the most forgiving, making it a good choice for first-time growers. Any high quality potting soil will work, as long as it doesn’t contain artificial extended release fertilizer (like Miracle Gro), which is unsuitable for growing good cannabis.

A very good choice for beginners is organic pre-fertilized soil (often referred to as “super-soil”) that can grow cannabis plants from start to finish without any added nutrients, if used correctly. This can be made yourself by combining worm castings, bat guano, and other components with a good soil and letting it sit for a few weeks, or it can be purchased pre-made from a few different suppliers.

As with all organic growing, this method relies on a healthy population of mycorrhizae and soil bacteria to facilitate the conversion of organic matter into nutrients that are useable to the plant. Alternately, you can use a regular soil mix and then supplement your plants with liquid nutrients as the soil is depleted.


Soilless (aka Hydroponics)
Indoor growers are increasingly turning to soilless, hydroponic media for cultivating cannabis plants. This method requires feeding with concentrated solutions of mineral salt nutrients that are absorbed directly by the roots through the process of osmosis. The technique for quicker nutrient uptake leading to faster growth and bigger yields, but it also requires a higher order of precision as plants are quicker to react to over or underfeeding and are more susceptible to nutrient burn and lockout.

grobox-3-1024x640.jpg

The GroBox provides everything you need to grow hydroponic cannabis in one kit. (Courtesy of GroBox)
Different materials used include rockwool, vermiculite, expanded clay pebbles, perlite, and coco coir, just to name a few. Commercial soilless mixes are widely available that combine two or more of these media to create an optimized growing mix. Soilless media can be used in automated hydroponic setups or in hand-watered individual containers.

Step 6: Determine What to Grow Your Cannabis In
What type of container you use will depend on the medium, the system, and the size of your plants. A flood-and-drain, tray-style hydroponic system may use small net pots filled with clay pebbles or just a big slab of rockwool to grow many little plants, while a “super-soil” grow may use 10 gallon nursery pots to grow a few large plants.

Inexpensive options include disposable perforated plastic bags or cloth bags, while some choose to spend more on “smart pots,” containers that are designed to enhance airflow to the plant’s root zone. Many people grow their first cannabis plants in five gallon buckets. Drainage is key, though, as cannabis plants are very sensitive to water-logged conditions, so if you repurpose other containers, be sure to drill holes in the bottoms and set them in trays.

Step 7: Feed Your Cannabis Plants Nutrients
Growing high-quality cannabis flowers requires more fertilizer, or nutrients, than most common crops. Your plant needs the following primary nutrients (collectively known as macronutrients):

  • Nitrogen (N)
  • Phosphorus (P)
  • Potassium (K)
These micronutrients are needed as well, albeit in much smaller quantities:

  • Calcium
  • Magnesium
  • Iron
  • Copper


If you aren’t using a pre-fertilized organic soil mix, you will need to feed your plants at least once a week using an appropriate nutrient solution. These nutrients are sold in concentrated liquid or powder form meant to be mixed with water, and generally formulated for either vegetative or flower (“bloom”) growth. This is because cannabis has changing macronutrient requirements during its lifecycle, needing more nitrogen during vegetative growth, and more phosphorus and potassium during bud production.

Most macronutrients are sold in a two-part liquid to prevent certain elements from precipitating (combining into an inert solid that is unusable by the plant), meaning you’ll need to purchase two bottles (part A and part B) for veg, and two bottles for grow, as well as a bottle of micronutrients. Other than these basics, the only other nutrient product you may need to purchase is a Cal/Mag supplement, as some strains require more calcium and magnesium than others.

Once you’ve purchased the necessary nutrient products, simply mix them with water as directed by the label and water your plants with this solution. You should always start at half-strength because cannabis plants are easily burned. It’s almost always worse to overfeed your plants than to underfeed them, and over time you will learn to “read” your plants for signs of deficiencies or excesses.

Step 8: Water Your Cannabis Plants
watering-cannabis-2-1024x640.jpg


Most people won’t think twice about the water they use on their plants; if you can drink it, it must be fine, right? Well, it may not be an issue, depending on your location, but some water contains a high amount of dissolved minerals that can build up in the root zone and affect nutrient uptake, or it may contain fungus or other pathogens that aren’t harmful to people but can lead to root disease.

Additionally, some places may have high levels of chlorine in the water supply, which can be harmful to beneficial soil microbes. For these reasons, many people choose to filter the water they use in their gardens.


The most important thing to remember during this phase is to not overwater. Cannabis plants are very susceptible to fungal root diseases when conditions are too wet, and overwatering is one of the most common mistakes made by the beginning grower. How often you water your plants will depend on the medium used, size of the plants, and ambient temperature. Some people will wait until the lower leaves of the plant start to droop slightly before watering.

As you gain experience and knowledge, you will alter your grow room and equipment to better fit your particular environment, growing techniques, and for the specific strains you choose, but hopefully this article will provide you with a solid foundation of knowledge to get started on the right foot. And remember, growing marijuana is a labor of love, so spend a lot of time with your plants and have fun!
 
How to Tell If a Cannabis Plant Needs Watering

watering-cannabis-2-1024x640.jpg


Giving a plant the proper amount of water may be more difficult than you think.

There isn’t an exact science for watering a cannabis plant—you can’t observe the roots (in most cases) and don’t have a way of knowing exactly what’s happening in the soil. Also, a plant is constantly growing and the climate it’s in may fluctuate, so the amount of water it needs will constantly change.

Despite this, here are some tried-and-true tips and strategies to help keep your plants healthy and properly hydrated.

How Often Should You Water Cannabis Plants?
When you think your cannabis plants might be thirsty, take time to observe:

  • Do the leaves look dark green or are they yellowing?
  • Are they vibrant, rigid and strong?
  • How does the soil feel?
A common mistake first-time growers make is to overwater a plant. A healthy cycle of wet and dry is necessary for the roots of a plant to grow out and reach deeper into the pot.

To see if a plant needs watering, stick a finger down a couple inches into the soil. If it’s dry, it’s time to water.


You can also pick up a pot and feel the weight of it to determine if it needs water. This will take some experience—be sure to lift up your pots after watering to get a feel for how heavy they are when full of water. This will give you a sense of what a light, or dry, plant feels like.

An underwatered plant looks droopy and weak, with yellow or brown leaves. There is no strength in the leaves and they feel lifeless. But an overwatered plant look similar, except that the leaves are dark green and the leaf tips will curl as if they are hiding from the water in their pot.

Obviously you don’t want your plants to ever be in either condition, but as you figure out your cannabis watering schedule, keep in mind that it’s better to underwater plants rather than overwater them.


Roots pull in oxygen as soil dries and when soil is too wet, the plant essentially can’t breathe.

Pay attention to timing and note the intervals at which you water your plants, and even write it down in a log. But keep in mind that as plants get bigger, they will need more water and need to be watered more frequently.

How Much Should You Water Cannabis Plants?
watering-cannabis-3-1024x640.jpg


The amount of water your plants need will depend on a number of factors, including:

  • Size
  • Outside temperature
  • Overall health
  • Stage of growth
You want to soak the pot and have run off through the drainage holes in the bottom of the pot. Water should pool up on the surface of the soil while you’re watering, but it shouldn’t sit on the surface after you move on to the next plant.

If a plant is very dry, water will run straight through the pot and quickly come out the drainage holes. If this happens, water the plant a little bit and come back to it after 10 minutes or so and water it again, and maybe even a third time. This will allow the soil to slowly absorb water incrementally, until all of the soil is thoroughly wet.

Take notes, make calculations, and get your plants on a watering schedule. Setting a cycle where the plant needs to be watered every two to three days is ideal.


As the plants grow, so will their need for water. You might need to top-off individual plants in between their full waterings as they grow and you figure out a consistent watering schedule.

The sooner you find the sweet spot between too wet and too dry, the sooner you’ll see your garden flourish.

Is Your Container the Right Size?
watering-cannabis-4-1024x640.jpg


To properly hydrate a cannabis plant, it needs to be in the correct container size. If the pot is too big, the plant can’t drink water where its roots don’t reach. If the roots aren’t absorbing water, water will sit and take a long time to evaporate, which can promote unwanted insects, fungus, and root rot.

Conversely, if a container is too small, the roots won’t be able to stretch out, which will ultimately stunt the growth of the entire plant. You will also need to water the plant all the time, which will add to your labor.


Ideally, plants should start in a small pot and progress to bigger and bigger pots as it outgrows each container. For example, you can start a clone or seedling in a 4″- or 1-gallon pot, then move on to a 2-gallon, 5-gallon, 10-gallon, and so on.

Plants are ready to transplant when a healthy root structure encompasses most of the soil, but the roots aren’t bound. Transplanting is a good opportunity to see the quality of your roots: bright white roots, with a strong thick structure is a sign you have been watering your plants correctly.

Materials for a Well-Hydrated Cannabis Garden
watering-cannabis-5-1024x640.jpg

These materials will help optimize your plants and make the watering process easier and more efficient.

Perlite
Perlite comes from obsidian, which is a volcanic glass. It is produced when obsidian is heated to a high temperature and then expands. It’s light, porous, and organic, making it a great addition for your soil, as it prevents soil from clumping and promotes oxygen flow.

Smart Pots
These pots are made with canvas, and the fabric helps roots breathe, allows heat to escape, and lets water drain. All of these traits will improve the quality of your plant roots and how they handle being watered.

Drip lines
Drip irrigation lines allow you to water plants consistently and distribute water evenly across the pot. They also prevent your pots from flooding on the surface when getting watered, which will cause perlite to come to the surface where it is useless. Drip systems also help prevent evaporation when you’re gardening in a hot climate.

Timers
It’s crucial that you measure how much water you are giving your plants. If you have an irrigation system, figure out the flow rate and set a timer so you can gauge when it’s time to move on to the next pot, ensuring every pot is receiving the same amount of water.
 
5 Reasons Why You Should Consider Growing Your Own Cannabis
grow-your-own-cannabis-plant-1024x640.jpg


Home cannabis cultivation has come a long way since the days of total prohibition, with more states and Washington DC now offering some form of cultivation provision. In these legal states, it has never been a better time to pick up growing as a hobby. Don’t fret if your thumb isn’t as green as you would like it to be; here are five reasons why you should throw your worries to the wind and just grow your own cannabis!


Because You Can: It’s Legal (Depending on Where You Live)
As of 2017, you can legally grow cannabis (with varied restrictions) in a number of states, plus Washington DC. As long as you meet the requirements to cultivate within these states, you’re free to grow your own. Pretty exciting, right?

Most states allow for the cultivation of between 4-6 plants, although there are some stipulations in certain states that allow for larger plant counts. Furthermore, many states that allow for home cultivation also provide stipulations allowing for for access points where you can pick up legal genetics such as seeds and clones to take home. These guidelines afford dispensaries and nurseries the opportunity to service a new market of home growers with house flavors to take home and try out in the garden.


The Control Is in Your Hands
Growing cannabis at home allows you to become your own master cultivator, giving you complete autonomy to control every aspect of the cultivation process. Given that there are so many different ways to become a successful cannabis grower at home, one of the most intrinsically rewarding aspects of this process is developing a system that works just right for you. Whether you are looking to cultivate organically, hydroponically, in soil containers, or raised beds, there is a system out there designed to make growing cannabis both easy and fun for your individual preference.


Having control over a grow not only gives a grower the opportunity to personalize their own cultivation style, it affords a level of safety for those who want to take precautions in order to create a safe-to-consume product. Certain pesticides, fungicides, miticides, fertilizers, and other garden amendments may be harmful to someone with a compromised immune system. Due to the lack of transparency when it comes to regulating garden inputs in some states, it can be unsafe for some individuals to rely on these products for their medicine. With home grow laws in place, patients who are in these positions can take control over their medicine by producing it in the comfort of their homes.

Growing Is a Gateway…Hobby
An interesting side effect of taking on cannabis cultivation as a hobby is the sudden uptick in interest you’ll generate for growing more than just ganja. Your green thumb for other crops may flourish once you get the hang of growing your own cannabis. What’s more, cultivation is an addictive practice that can almost certainly leave you hooked on not only general horticulture, but many other trades tied to the practice as well. The same principles and practices that apply to cannabis cultivation will also help you develop a myriad of other life skills along the way.


Think about it: successful growers also must be successful electricians, designers, plumbers, carpenters, and even aficionados. Each of these skills required to succeed in the grow room is a new opportunity to dive into something new and exciting. The upside: these are alllife skills that you will have in your personal arsenal regardless of whether or not you continue to cultivate.

You’ll Save Money Over Time
The initial investment cost associated with home growing is a major concern for many who are worried that their equity in growing won’t pay itself off over time. Fortunately, growing isn’t reserved for just those who can afford it, and you’ll be able to get started on virtually any budget. In fact, many grows can actually pay back their initial investment after just one successful harvest.


Yes, there will always be some startup costs associated with building out a grow space, but these costs dissipate over time as your space will require less monetary input to sustain viability. Although the price of cannabis continues to drop at the dispensary level, buying over time can definitely add up faster than the handful of inexpensive inputs required to maintain your home grow.

Learning Is Easy
Home cultivation resources have never be more widely available than they are right now with the end of prohibition on the horizon. As more jurisdictions begin to afford growers their rights to cultivate at home, the quality and quantity of educational information available to growers will only continue to expand. Books, magazines, websites, forums, online and in-person growing communities—these are just a few examples of ways in which growers are sharing the bounty of their knowledge with the world.

Long gone are the days of searching clandestine threads online for grow tips. Nowadays there are multiple weekly podcasts dedicated to cannabis cultivation, as well as open workshops in legal states where growers can actually meet face-to-face to talk about growing. These are not only exciting times for cannabis enthusiasts everywhere, but the perfect time for the new home grower to get started!
 
How to Grow Bigger Cannabis Buds Outdoors and Indoors
how-to-grow-bigger-buds-header-1024x640.jpg

If you are a cannabis grower, you know the underlying goal is to grow the biggest and healthiest buds possible in your garden. You also know the feeling of disappointment when a strain you’re growing never fully develops the dense sticky buds you hope it would. While some strains are low-yielding, you should always be able to produce a high-quality bud if you’re taking the right steps.


Thankfully, there are a number of ways to improve the size of your buds. Pruning, training, feeding, and lighting are the most common ways to dictate how your plant will develop.

Pruning
how-to-grow-bigger-buds-trimming-1024x640.jpg


Cannabis buds will form at most of the plant’s nodes. A node is where a leaf or branch grows off the stalk. The larger the plant grows, the more nodes will appear, which means your plant will have more locations where buds can grow.


Intuitively, you might think that more nodes means more and larger buds, but this is far from the truth. Nodes with buds that are lower down on the plant away from the canopy will try to develop in flowering but will never become fully developed because they do not receive adequate light.

If you want to improve the yield of your plant, the best method is to prune away any plant life that isn’t receiving quality light. Trim away the buds and foliage that are under the canopy to “lollipop” your plant. This strategy will send all the energy into the canopy where the buds are receiving the most light, thus giving you bigger, denser nugs.

Training
how-to-grow-bigger-buds-training-1024x640.jpg


Another simple way to increase your yields is by training your cannabis plants. If left alone, plants generally grow one main large stalk with other small stalks growing up around it. A cannabis plant will grow in the shape of a menorah, where the center candle highest up represents the main large stalk. While this one large stalk will grow a beautiful large cola, the height of this one cola will dictate where the lights can be placed if growing indoors. This results in the lower branches receiving significantly less sunlight than would be possible with an even canopy.


By super cropping (high-stress training) or using LST (low-stress training) methods such as tying down the top branches, you can motivate the rest of the surrounding branches to develop, thus creating a more level canopy. What happens when you train your plants is the growth hormones that are focused on the main stalk are redistributed to the surrounding branches, promoting growth for the entire plant. This results in an even canopy of branches that will all grow large colas while being equal distance from the light source.

Feeding
how-to-grow-bigger-buds-feeding-1024x640.jpg


Correctly feeding your plant is absolutely necessary when trying to grow large buds. Nitrogen is associated with vegetative growth, while phosphorus is the nutrient that is most closely associated with flowering plants. Feeding a plant nitrogen while it is vegging creates a healthy, vibrant plant at a young age that will grow rapidly, which leads to increased yields.


Once your plant switches to flowering, decrease your nitrogen levels and increase phosphorus levels to help the buds fully develop and become dense. If growing in soil, when switching from vegetative growth to flowering, top dress the soil with bat guano or worm castings as a great way to increase phosphorous levels while you liquid feed your plant other nutrients.

Another tip for growing bigger buds involves regularly feeding compost tea to your soils. Compost teat helps develop healthy mycorrhizal relationships between the soil and mycelium. The more mycelium in the soil, the more nutrients the plant is going to take up, which will result in bigger buds.

Lighting
how-to-grow-bigger-buds-lighting-1024x640.jpg


If you want to grow big buds, you need to have big lights. When you identify the highest-quality cannabis in stores or dispensaries, you’re looking at cannabis where growers provided optimal indoor and outdoor lighting. You can’t cut corners when it comes to properly lighting your grow area. A basic guideline for lights is generally every 100 watts can cover one square foot. For example, a 600-watt light can cover a 6’x6′ area.

grobox-2-1024x640.jpg

The GroBox can help grow cannabis plants in a small space. (Courtesy of GroBox)
Make sure your lights are at the right height so your plants are not suffering from heat stress. The plants should not feel hot, nor should your hand if you hold it at the top of the canopy. If you want to be precise, you can use a digital thermometer to figure out the precise temperature. By providing the right amount of light and keeping the lights the right distance away from your plants, you’ll keep your grow happy, resulting in the desired bigger buds.


If growing outdoors, make sure your pots or trenches are spaced far enough apart so that the sides of the plants can receive full sun. Growing on a south-facing slope will guarantee your plants are receiving as much sun as possible.

Growing bigger buds is a lifelong ambition for most gardeners. However, bigger buds won’t happen overnight. Gardening is a skill that takes time to refine since you can’t speed up a plant’s growth process. One of the best things you can do is to write down what you’re doing to your grows every day; that way, if you have a successful harvest, you can revisit what you might have done differently in your garden and replicate it with future grows.
 
5 of the Hardest Cannabis Strains to Grow
hardest-strains-to-grow-1024x640.jpg

As you develop your farming craft and become more comfortable in your cannabis garden, you might find yourself looking for a new challenge. One option is to explore strains that are regarded as difficult to grow. If growing for personal use, you may try to conquer strains that are not popular among commercial farms because of their long flowering periods, low yields, and specific feeding requirements. Large grow operations tend to avoid tackling difficult or risky strains because they’re often not worth the additional time, money, and labor.


Generally, growers tackle these issues by crossbreeding plants for high yields, short flowering cycles, and low-maintenance feeding requirements. For this reason, many strains that are regarded as difficult to grow are landrace strains. “Landrace” refers to feral strains that have long grown in one geographic location without hybridization. These varieties often have varying and specific needs, making them some of the more complicated plants to grow. However, plenty of modern hybrids can prove to be challenging as well.


Here are five examples of hard-to-grow strains that ambitious growers may consider if they’re looking for a challenge.

Colombian Gold
Colombian Gold is a landrace sativa hailing from the Santa Marta mountains of Colombia. Made famous over the century as a high-quality cannabis export to the United States, it made a comeback when its genetics were used in the creation of Skunk #1.


What makes Colombian Gold a difficult strain to grow is its large stature and long flowering periods. To produce this strain indoors, you must be on top of your pruning game; its growth takes off and will quickly overrun your space. The lengthy flowering cycle also increases the chance of error, but if you can bridle this strain, you will be rewarded with a classic quality landrace strain with an exceptional high that electrifies the senses.

San Fernando Valley OG
A beautiful California native, the SFV OG hybrid can be a tricky strain to tame. It has specific feeding needs and a flowering period that extends longer than normal.

OG genetics often require heavy feeding – specifically, they’re known for consuming large amounts of calcium and magnesium (also known as “Cal Mag”). You need to be able to read the plant deficiencies to ensure you don’t over or underfeed this strain. Additionally, SFV OG is a dense plant that will benefit from pruning and topping at an early age. If successful, you will be rewarded with dense, beautiful colas that offer a pungent taste and powerful high.


Dr. Grinspoon
This landrace sativa strain is named after longtime cannabis advocate and professor at Harvard, Dr. Grinspoon. The genetics are held by Barney’s Farm in Amsterdam and are well known amongst connoisseurs for its cerebral effects and quality of flavor. It is also known for its strange bud structure.

Dr. Grinspoon is difficult to grow because of this bud structure. It can take ages for it to flower and for the airy buds to develop any weight. “When mature, the colas resemble compact green and reddish brown beads,” Barney’s describes. “These loosely hang on thin stems.” The stems and buds are brittle, but the end product is something you will rarely ever see.


Chocolate Thai
Thai landrace genetics are being kept alive by a breeder in California by the name of DarwoH, and Chocolate Thai is a nostalgic strain commonly associated with the famed Thai sticks of the 1970s and 80s. Cannabis from this region of the world has always been celebrated and cherished for its unique cerebral effects.

The difficulty of this strain can be attributed to its lengthy flowering cycle. Similar to all southeast Asian landrace strains, flowering may take up to 14 weeks. If you have the space, time, and skill to produce a decently yielding Chocolate Thai or any other southeast Asian landrace strain, you have something to be very proud of and will be sure to impress anyone who fondly remembers days spent with Thai sticks.

Headband
Headband has become a very popular strain in the past years. With its high-THC content, Headband provides relaxing effects while holding onto the flavors of its parents OG Kush and Sour Diesel.

What makes Headband difficult to produce is its bud structure. Where OG strains are commonly known for their dense, large colas, Headband produces smaller buds that blanket the plant. Because of this, getting a decent yield with consistent quality can be difficult. Being able to use the SCROG (screen of green) method can help overcome this obstacle.
 
Avoid These 5 Common Cannabis Growing Mistakes

grower-mistakes-1024x640.jpg

Cannabis plants are known to be resilient. The plant grows successfully all over the globe in an array of climates, leading many to believe that the plant with the nickname “weed” should be a simple crop to grow. Keep in mind, however, that the cannabis consumed today is not like that which grows wild in the mountainous valleys of Nepal.


The sought-after cannabis of today’s market is cured, seedless, and potent with thick, flavorful buds. But achieving great cannabis is no easy feat, and many mistakes can be made along the way. Here are five of the most common pitfalls you can avoid with some preparation and careful monitoring.

1. Overfeeding Cannabis Plants
Overfeeding your plants is a classic mistake made by novice gardeners; you see your plants growing every day, but you’re concerned that the buds might not be developing fast enough. As animals, we intuitively think food equals growth, but overeating doesn’t do you or your plant any good. Food does not always promote growth. In fact, it can mean the exact opposite: overfeeding your plants can kill your garden.

Nutrients come in two forms: non-organic and organic. Organic nutrients come from compost, manure, and other refined minerals in the ground. They release slowly into the soil when applied and are not readily available for the plant to take up in excess, which means organic nutrients are your safest bet to try and avoid overfeeding.


However, you might not get the immediate boost you want from organics, so you might use non-organic nutrients. Or, if growing hydroponically, you may be using liquid non-organics. These products pack a lot of food into a small bottle, requiring precise measurements. Additionally, non-organics are readily available for the plant to uptake. For this reason, using too much will cause the plant to overfeed and “burn” itself, resulting in death or loss of yields.

When it comes to feeding, start low and slow. Follow the instructions and start below what is recommended. Observe your plants daily and communicate with your local grow store when looking for recommendations. Nutrients allow you to grow quality cannabis, but you must pay close attention.

2. Overwatering Cannabis Plants
When caring for a cannabis garden, cultivators are quick to fret over whether or not their plants are getting all the water they need. But like overfeeding, giving your plants too much water can harm or even kill them.

Overwatering will cause your roots to suffocate and die. Once root rot sets in, it’s nearly impossible to remove and you will have to start over. To avoid this setback, make sure the top inch of the soil is bone dry, or even lift your pots to get a feel for their weight. If you’re truly unsure, you can wait to see a little wilting in your plants to be sure they are ready for water.


Measure how much water your plants receive and develop a schedule. As they get bigger, you can increase the water quantity – but do so with caution.

3. Unsuitable Climate Control
Whether you’re gardening inside, outside, or in a greenhouse, you need to be fully aware of your climate. Temperature and humidity are crucial to the development of quality cannabis.

Let’s start with temperature. If your garden is too cold or too hot, you will see side effects. Cold temperatures can stunt your plants’ growth, and even colder temperatures will kill them. On the contrary, if your plants are too hot they will develop heat stress. The leaves curl in as if hiding from the light or sun, and the plants become weak and tired. If the hot climate continues, you will constantly battle this heat stress and the plant will eventually die or produce very unhealthy buds.


Cannabis plants can take extreme climates, but not routinely. You want to keep your plants happy at around 75°F when possible. If you’re lucky enough to garden outdoors where nights stay in the upper 50s, you will find a plant that grows faster than you ever imagined possible.

Make sure you also keep the humidity level of your garden low. Humidity provides a breeding ground for ever-present mold, which is constantly looking to decompose anything around it given the right climate. Seedlings like a higher humidity content, but as the plant develops, humidity should decrease. Starting around 60% and reducing to around 40% is generally considered good practice. To control humidity, use intake and outtake fans, open walls in greenhouses to burp the humid air out, and utilize dehumidifiers.


4. Using the Wrong Water pH for Cannabis
If the water you’re using for your cannabis garden is too acidic or basic, you can run into some real problems. Ideally, you want to use water that is between a pH of 6.0 to 7.0. This pH level allows your plants to absorb the full range of nutrients it desires. Fall outside of this range and you will start to see nutrient deficiencies because the water is lacking in acidity or is too acidic for that nutrient to become available.

Check the pH level of your water source routinely. You can buy filters to maintain a specific pH level and/or put additives in your water to raise or lower the acidity.

5. Poorly Installed Electrical Systems
Whatever electrical system you’re installing for your garden, make sure it is done properly. Because of security and legality, many growers have done their own electrical work, but it’s important to find someone with a background as a licensed electrician to help you.


Though costly up front, a dependable system will save you time and a headache. Electrical fires or malfunctioning systems will ruin your garden and put your life and property at risk.
 
Sustainable Gardening Practices for Growing Cannabis

sustainable-gardens-3-1024x640.jpg

Indoor Marijuana Leaf under lights
Growing and maintaining your very own indoor cannabis garden can easily burn a hole through your pocket. Between frequent visits to a hardware store and the local hydroponics shop/garden center, building out and maintaining even a small home grow can be quite expensive. Add on recurring monthly utility expenses and the inevitable costs of growing and maintaining a cannabis grow with changing seasons and the final overhead can quickly burn a hole through your “budget grow.”


One way to heavily reduce overhead in your garden is to incorporate sustainability practices throughout your operation. Every decision you make in your grow, from the lighting you choose to the medium you plan to grow in, will have a variable impact on your spending over time. Listed are a few helpful, cost-effective strategies to consider for incorporating sustainable practices into your indoor cannabis garden

Cannabis Grow Lights With Lower Energy Output
sustainable-gardens-4-1024x640.jpg


If you’re running a small grow, say a less than 1000w light system, chances are you aren’t overly concerning yourself with the electrical nuances. However, having a basic understanding of the electrical system in your home can give you a great advantage when setting up the most cost-effective garden possible.

Here’s an example: Most homes are equipped primarily with 110v circuits, though in areas such as the kitchen and bathrooms, there are often 220v circuits. This is because your refrigerator and washer/dryer tend to run at 220v. If you’re running these circuits at 80% capacity (the recommended max), at 110v, you’re afforded just under 1800w of available power, doubling that number for 220v. Between a light system, fans, air conditioners, dehumidifiers, heaters, and the variety of other energy-sucking mechanisms at play in your garden, running up wattage may be easier to do than you thought.


Consider growing with lights that require less energy, such as LED systems, ceramic metal halide or LEC (light emitting ceramic) lights. Many growers prefer to spend the extra money up front for these lights in order to save more over time in their energy bill. Dollar for dollar, LEDs are the most sustainably cost-effective solution for lighting in an indoor home grow. LECs are not too far behind either, with a 300w system producing results similar to what most 600w HID systems will give you.

When incorporating climate control solutions into your garden, consider natural solutions. Many times, creating airflow pathways in and out of your garden can reduce temperatures to the point where air conditioner units become unnecessary. Practices such as running lights at night are also a great way to take advantage of the natural cool air. By reducing the need for various devices, you’re naturally bringing your energy bill down while alleviating your circuits from unnecessary stress.

Sustainable Cannabis Grow Mediums
sustainable-gardens-2-1024x640.jpg


Another cost-effective strategy is to incorporate the most sustainable grow medium possible into your regimen. No-till, organic gardening practices are a great way to make your garden more sustainable. By building and maintaining an active food web within your soil, containers almost never need to be changed out between grows; simply remove the root ball and re-transplant.

Organic gardening is much less expensive in that proper super soils require little to no amendments over time — their nutrients are readily available within the soil. Feeding regimens for an all-organic grow are often simply reverse osmosis water, and that’s it, thus, eliminating the need for expensive nutrients that must be refilled over time.


Many organic garden remedies can be concocted using simple everyday household ingredients, another cost-effective way of eliminating expensive small bottles that seem to disappear all too quickly.

Cloning Cannabis for Perpetual Growers
sustainable-garden-1-1024x640.jpg


Heading to your local dispensary to pick up new clones or seeds after every grow season can be costly. One way to reduce overhead over time is to create your own cloning regimen within your garden. The initial upfront cost for a small cloning space can be surprisingly low if you stick to the basics. Over time, having a perpetual garden equipped with a cloning area will save you hundreds of dollars in seed/clone costs.


To get started with cloning you will need a small t5 fluorescent light (24” will do just fine). You’re also going to need a cloning tray with a dome in order to retain proper relative humidity for the clones to root out. A few other helpful items to purchase up front are cloning gels, aerated grow mediums such as coco or rock wool cubes, thermometers and hygrometers, and a sterilized blade of some sort.

Again, the upfront cost of these items may set you back a few dollars, but this will save you lots of money over time. More expensive cloning units are available and may be a solid investment if you plan on incorporating cloning into your long-term grow plan.

The Power of DIY Cannabis Gardens
sustainable-garden-5-1024x640.jpg


With grow technology advancing at a rapid pace, it becomes easy to rely on new innovations to outfit our gardens with the latest products. Keep in mind, however, that while some purchases are unavoidable, you don’t necessarily have to break the bank in order to get your grow started. If you have the time to invest, consider a DIY buildout as a cost-effective way to manage your low overhead garden. DIY projects almost always require less monetary investment so long as you’re willing to add a little elbow grease.

Keep in mind that DIY grow builds may have some learning curves to overcome. Luckily, with the Internet at our fingertips, and a large community of DIY growers eager to share their information, you should be able to find a blueprint to any given project relatively easily.

Sometimes, getting creative is what it takes to reduce overhead in your garden. With these four basic cost-effective strategies, hopefully you’ll be able to build a more sustainable grow that will end up saving you in the long run. By reducing your energy output through smart purchases and careful planning, choosing a sustainable grow medium, incorporating cloning techniques, and embracing the power of DIY, you can substantially bring down your overhead over time.
 
Odor Control Tips for Your Indoor Cannabis Grow Room

odor-control-tips-3-1024x640.jpg

Close view of an indoor hydroponic marihuana cultivation.
As much fun as starting your indoor cannabis garden can be, having a home perpetually filled with the smell of fresh flowers can be a serious inconvenience, if not to you than perhaps your neighbors. Although smells from a micro-sized, one plant closet garden is much easier to manage than a larger grow tent holding several flowering plants, either scenario can produce pesky odors that will permeate an entire home if left unattended.


Fortunately, there are a range of techniques that can be implemented to mitigate this odiferous opportunity which can be implemented in any sized indoor grow. If used in combination with one another, many of these techniques are capable of completely removing all odors in a cannabis grown room, leaving you to propagate worry-free.

Check Your Temperature and Humidity Levels
odor-control-tips-4-1024x640.jpg


The first step in proper odor management is to make sure that your grow space’s temperature and relative humidity are under control. High temperature and humidity will perpetuate any odor issues that your garden may encounter, though this will most affect your garden in the bloom phase.

Plants that are in their vegetative phase maintain a very low odor as the plants have not yet begun to produce terpenes, the molecules responsible for a cannabis plant’s aromatic properties. As cannabis transitions to its bloom phase and begins to produce flowering nodes, trichomes will develop. Being the molecule factories that they are, trichomes begin to produce these aromatic compounds in abundance.


As your plants continue to grow and transition, temperature and humidity become increasingly vital to manage in order to keep odors under control. Some ways to immediately tackle these issues include outfitting your grow space with dehumidifiers and air conditioners. Although these options will greatly benefit a closed space, moving heat and humidity out of a room may be the better place to start.

Make Sure Air is Circulating Through Your Garden
odor-control-tips-5-1024x640.jpg


Proper air circulation is at the center of maintaining temperature and humidity control. All grow lights produce heat in varying quantities. Smaller grow systems utilizing cooler lights such as compact fluorescents or LEDs may have an easier time suppressing heat than hotter systems like high intensity discharge (HIDs) or ceramic metal halides, but both will fry your garden with dangerously high temperatures if there isn’t adequate ventilation and circulation.

Ideally, air needs to move through a garden every few minutes during vegetative phases and every minute during bloom phases. Not only does air circulation help keep temperatures and odors low, it will recycle used CO2 out of your grow space. The easiest solution to air circulation is to outfit your garden with fans. Standing fans, oscillating fans, as well as ducted intake and exhaust fans will all do wonders in and of themselves, but when combined, they can move air through your garden in a matter of seconds, taking odors out with them.


When you’re looking to outfit your garden for the right sized fan, look for a CFM rating. This will give you an indicator as to how much cubic feet your fan is capable of moving through a space in a minute (you’ll need a cubic foot/meter measurement of your grow space for this).

Odor Absorbing Gels May Help
odor-control-tips-2-1024x640.jpg


Odor becomes much more difficult to manage in the final six weeks of a cannabis plant’s lifecycle. This is the stage where trichomes are producing their highest concentration of terpenes, and your garden is certainly going to try to show them off to you (and perhaps to your neighbors). Air circulation and ventilation aside, there comes a time when all of the air in your living space will contain traces of your garden’s fresh floral smell.

At this point, you may want to consider more rigorous odor management practices such as odor absorbing gels. These products work by attaching to odors and replacing them with other, more appealing scents. Keep in mind that odor gels do not eliminate odors, but simply mask them. Odor eliminating sprays help a bunch as well, but they operate under the same principle, not actually removing odors, but simply making them more pleasant.

Try Activated Carbon Filters
odor-control-tips-1024x640.jpg


If you want to destroy 90% of the odors in your garden on contact, you’ll want an activated carbon filter. Also known as “carbon scrubbers” for their ability to literally scrub contaminants out of the air, these devices employ activated and highly ionized carbon to attract particulates from the air. Dust, hair, mold spores, and volatile organic compounds responsible for carrying odors are all trapped either in a pre-filter or by the ionized carbon molecules inside of the filter’s main cylinder.

Filters in a flowering garden can serve one of two purposes. With CO2 supplemented air or in rooms very high in CO2, filters can be placed on the floor to recycle scrubbed air back into your space. However, most rooms utilize carbon filters with an exhaust, a great way to not only redistribute heat, but stale, depleted air as well.


Carbon filters come in different shapes and sizes and can be complemented by the addition of a duct fan. This will either serve to circulate contaminated air though your filter or to exhaust clean air out from your filter with the assistance of some ducting. Not all carbon filters are created equal, so be sure to purchase a reputable model. Filters come in various shapes as well, so outfitting a model that fits your space is key.

Like fans, carbon filters are also characterized by CFM rating. In many cases, the CFM rating and ducting diameter of your fan and filter will coincide. Most of the time, carbon filters are at their peak productivity when positioned at the highest point in your grow space. This is where the most heat will accumulate.


A temperature controlled, fully ventilated space outfitted with several fans and a carbon filter exhaust is capable of removing nearly 100% of the odors in your grow space. What this setup cannot eliminate on its own can be easily supplemented with an odor eliminating spray or gel. Furthermore, carbon scrubbed environments can bring the airborne bacterial counts in your space from a whopping 10,000 parts per million (ppm) all the way down to as low as 30ppm. Your local hardware store and/or hydroponic supplier should have everything you need to implement a similar system into your own garden.

Remember to always be courteous when growing indoor cannabis and understand that the odors associated with this hobby are not equally pleasing to everyone. Employing any one or combination of these systems will not cost you too much out of pocket, and the investment at the end of the day should pay itself over in the silence of your unhindered friends, family, and neighbors.
 
Diagnosing Cannabis Nutrient Deficiencies in Sick Plants

diagnosing-nutrient-deficiencies-1-1024x641.jpg


The secret to growing great cannabis isn’t really a secret at all; provide your plants with adequate light, a suitable climate, the right amount of water, and proper nutrients, and you will have healthy plants capable of fighting off most pests and diseases.

When plants do not receive the correct level of nutrients, they become stressed and more susceptible to bugs, mold, and other pathogens. Their growth may also be stunted, resulting in reduced yields. Knowing the signs of nutrient deficiency is a vital skill for budding cannabis growers, so let’s take a look at all the essential nutrients, the symptoms associated with their absence, as well as other factors in potential deficiencies.

Getting the Right pH for Your Cannabis Plants
diagnosing-nutrient-deficiencies-2-1024x641.jpg


Plants can only absorb nutrients through their roots if the growth medium or hydroponic solution is at the correct pH. If conditions are too acidic or too alkaline, certain nutrients become unavailable to the root system. Over-fertilizing your plants can quickly lead to pH problems and nutrient lockout, showing symptoms that are easily mistaken for a nutrient deficiency to the untrained eye.

Before attempting to diagnose any nutrient deficiency, be sure that the pH of your soil, medium, or hydroponic solution is within the acceptable range. For soil and soil-like media, the range is 5.8 to 6.8, with 6.3 considered optimum. The proper range for hydroponic solutions is 5.5 to 6.5, and most brands of hydroponic nutrients will indicate an ideal level for their product. Testing the pH of your water is also recommended, as it can vary widely depending on the source.

“Mobile” and “Immobile” Nutrients
diagnosing-nutrient-deficiencies-3-1024x641.jpg


Nutrients are classified as mobile or immobile depending on whether they can be translocated once they have been fully assimilated by the plant. A mobile nutrient stored in the older leaves of the plant can be moved to solve a deficiency in another part of the plant. Immobile nutrients will remain very close to where they were initially deposited.

Mobile nutrient deficiencies will show symptoms in the older leaves at the base of the plant, while immobile nutrients will show the first signs of deficiency in the newer growth at the top and outer branches of the plant. Knowing which nutrients are mobile and which are immobile will help you diagnose potential deficiencies.

Essential Cannabis Nutrients and Symptoms of Deficiency
diagnosing-nutrient-deficiencies-4-1024x641.jpg

Your plant needs several essential nutrients, so be sure to keep an eye on these signs and visual cues that could indicate a potential deficiency.

Nitrogen (Mobile)
The most common nutrient deficiency in cannabis, nitrogen is essential throughout the lifecycle of the plant, but especially during vegetative growth.

Nitrogen Deficiency Symptoms:

  • An overall lightening and then yellowing in older, mature leaves, especially near the base of the plant
  • Severe deficiency will see continued yellowing, progressing up the plant, with possible discoloration and brown spots at leaf margins; eventually leaves curl and drop
  • Decreased bud sites and earlier flowering with substantially reduced yields


Phosphorous (Mobile)
Phosphorous is essential for photosynthesis and the release of stored energy in carbohydrates. While deficiency is uncommon (usually developing due to pH being above 7.0), the result can be catastrophic for young plants, and lead to stunted growth, delayed flowering, low yields, and poor resin production in mature plants.

Phosphorus Deficiency Symptoms:

  • Purpling of the petioles (leaf stems) on older leaves, followed by leaves taking on a dark blue-green hue
  • As deficiency progresses, both upward and outward growth slows drastically, blackish-purple or dark copper colored spots appear on leaves, and dead spots develop on petioles while leaves curl and drop
  • Sometimes leaves turn metallic purple or dark bronze in color


Potassium (Mobile)
Crucial to the production and movement of sugars and carbohydrates, potassium is also indispensable to the process of cell division as well as transpiration, root growth, and water uptake. Simply put, without it plants can’t grow. Deficiency leads to increased internal temperatures in the foliage of the plant, which causes the plant to evaporate more moisture through its leaves to cool down.

Potassium Deficiency Symptoms:

  • Dull, overly green leaves, followed by “burnt” rusty-brown leaf tips, chlorosis (yellowing), and brown spots, particularly on older leaves
  • Further deficiency shows in leaf burn, dehydration, and curling of younger growth
  • Left unchecked, potassium deficiency will result in weak plants, high susceptibility to pests and disease, and drastically reduced flowering


Calcium (Immobile)
Essential to cell integrity and growth, calcium aids the flow of nitrogen and sugars through the plant. Deficiency is usually found in hydroponic gardens or outdoors in very wet, cool climates with acidic soil.

Calcium Deficiency Symptoms:

  • Lower leaves curl and distort, followed by irregular brownish-yellow spots with brown borders that grow over time
  • Root tips will start to wither and die, and the plant will become stunted with decreased yields


Magnesium (Mobile)
Magnesium is the central atom in every molecule of chlorophyll, meaning that plants use it in very high amounts. It is crucial for absorbing energy from light, as well as helping enzymes create the carbohydrates and sugars that produce flowers.

Magnesium Deficiency Symptoms:

  • Plants will not show signs of a magnesium deficiency until 3 to 6 weeks after it has begun, at which point you’ll see the areas between the veins of older leaves turn yellow (interveinal chlorosis) and the formation of rust colored spots
  • These symptoms will progress through the whole plant, with more and larger spots developing in the interveinal areas as well as tips and margins of leaves
  • Some leaves will curl, die, and drop, while the whole plant looks sickly and droopy
  • Symptoms of magnesium deficiency will quickly escalate during flowering, leading to a reduced harvest


Sulfur (Semi-Mobile)
Essential to plant respiration and the synthesis and breakdown of fatty acids, sulfur plays a huge part in the production of oils and terpenes. It is uncommon to see a sulfur deficiency in cannabis, but these deficiencies are usually the result of a loss of phosphorous due to a high pH level in the root zone.

Sulfur Deficiency Symptoms:

  • Look for young leaves to turn lime green then yellow with stunted growth, followed by the yellowing of leaf veins accompanied with drying and brittleness
  • Continued deficiency results in slow, weak flower production with lowered potency


Copper (Semi-Mobile)
Needed only in trace amounts, copper aids in nitrogen fixation, carbohydrate metabolism, and oxygen reduction.

Copper Deficiency Symptoms:

  • Deficiency is very rare, and first symptoms are seen in the slow wilting, twisting, and turning of new growth
  • Dead spots appear on leaf tips and margins, and sometimes the whole plant wilts


Iron (Semi-Mobile)
Iron is essential for nitrate and sulfate reduction and assimilation, and a catalyst for chlorophyll production. Deficiencies are usually the result of improper pH levels or excess levels of manganese, zinc, or copper.

Iron Deficiency Symptoms:

  • Initial symptoms appear in younger growth, with interveinal chlorosis showing at the base of new leaves
  • Symptoms then progress through the leaves and into older growth, with overall yellowing between leaf veins


Manganese (Immobile)
Manganese helps utilize nitrogen and iron in chlorophyll production as well as aiding in oxygen reduction. Deficiency is rare and usually caused by high pH or an excess of iron.

Manganese Deficiency Symptoms:

  • As with other immobile nutrients, symptoms start in the new growth, initially showing interveinal chlorosis followed by necrotic spots, gradually spreading to older leaves
  • The most obvious sign is when leaf margins and veins remain green around the yellowing of the interveinal areas


Molybdenum (Mobile)
A player in two major enzyme systems that convert nitrate to ammonium, molybdenum is used by cannabis in very small amounts. Deficiencies are rare and can occur as the result of cold weather.

Molybdenum Deficiency Symptoms:

  • Older leaves yellow, sometimes developing interveinal chlorosis and discoloration at leaf edges
  • Eventually leaves cup and curl up before twisting, dying, and dropping


Zinc (Immobile)
Zinc is crucial for sugar and protein production, as well as in the formation and retention of chlorophyll and for healthy stem growth. Deficiency is quite common, especially in alkaline soils and dry climates, and is usually the result of high pH levels.

Zinc Deficiency Symptoms:

  • Young leaves and new growth exhibit interveinal chlorosis, with small, thin leaf blades that wrinkle and distort
  • Leaf tips will discolor and burn, followed by leaf margins and then brown spots
  • The most obvious sign is leaves that turn 90 degrees sideways
 
How to Grow Marijuana Outdoors: A Beginner’s Guide

Growing cannabis is a fun and rewarding experience, but it is also challenging and takes a certain amount of time and money. For a first-time grower with limited resources, an indoor grow is probably too costly of an option.

The good news is that a small outdoor garden can yield plenty of quality cannabis without a large monetary investment. If you have access to a sunny spot in a private yard or even a balcony, terrace, or rooftop, you can successfully grow cannabis.

This guide to outdoor growing will go over all the different factors you need to consider in order to set up your first outdoor grow.


Step 1: Consider the Climate
It’s crucial to have a good understanding of the climate in the area you’re going to grow. Cannabis is highly adaptable to various conditions, but it is susceptible to extreme weather.

Sustained temperatures above 86°F will cause your plants to stop growing, while continued temperatures below 55°F can cause damage and stunting to plants, even death.

Heavy rains and high winds can cause physical damage to plants and reduce yields, and excessive moisture can lead to mold and powdery mildew, especially during the flowering stage.


In addition to weather patterns, you need to understand how the length of day changes throughout the seasons in your area. For example, at 32° N latitude (San Diego), you will experience just over 14 hours of daylight on the summer solstice (the longest day of the year), while at 47° N (Seattle), you will have about 16 hours of daylight on the same day.

Understanding the amount of sunlight throughout the year is crucial to causing plants to “flip” from the vegetative to flowering stage, when they start to produce buds.

It’s good to utilize local resources, as experienced gardeners in your area will have a wealth of knowledge about growing flowers and vegetables, and that information can also be applied to growing cannabis. If you have some experience gardening and growing veggies, you will probably find that growing cannabis outdoors is a fairly easy endeavor.

Step 2: Pick a Space for Your Garden
Choosing a space for your outdoor garden is one of the most important decision you’ll make, especially if you’re planting directly in the ground or in large immobile containers.

Your cannabis plants should receive as much direct sunlight as possible, ideally during midday, when the quality of light is best. As the season changes and fall approaches, your plants will get less and less sunlight throughout the day, which will trigger the flowering stage.

Having a constant breeze is good for your plants, and especially in hot climates. But if you live in an area with a lot of high winds, consider planting near a windbreak of some sort, like a wall, fence, or large shrubbery.


Finally, you will want to consider privacy and security. A lot of people want to conceal their gardens from judgmental neighbors and potential thieves. Tall fences and large shrubs or trees are your best bet, unless you live in a secluded area.

Some growers plant in containers on balconies or rooftops that are shielded from view, while some build heavy-gauge wire cages to keep thieves and animals at bay. Whatever you decide, think about how big you want your final plant to be—outdoor cannabis plants can grow to 15 feet tall or more, depending on how much you let them go.

Step 3: Decide on Genetics
The success of your outdoor cannabis grow will also depend on choosing the right strain to grow for your particular climate and location. If you live in an area with a history of cannabis growing, chances are good that many strains will successfully grow there, and some may have even been bred specifically for your climate.

Seeds vs. Clones
Plants grown from seed can be more hearty as young plants when compared to clones. You can plant seeds directly into the garden in early spring, even in cool, wet climates.

The main drawback to growing from seed is there is no guarantee as to what you’ll end up with. If your seeds don’t come feminized, you could end up with both males and females, in which case you’ll need to sex them out to get rid of the males (only females produce buds).

Even when you do have all female plants, each will be a different phenotype of the same strain. To get the best version of that strain, you’ll need to select the best phenotype, which can be a lengthy process. A lot of beginning growers start with feminized seeds.


Depending on the legality of cannabis in your state, you may be able to buy clones or seedlings from a local dispensary. Some growers stay away from these because they feel they aren’t as sturdy as growing plants from seed.

Autoflowering seeds are another popular choice for outdoor growing, as they start blooming as soon as they reach maturity regardless of the length of day. You can either have a quick-growing crop, or fit multiple harvests into a year with autoflowering cannabis.

The downside to autoflowering cannabis is that they tend to have a lot less potency.

Step 4: Acquire Some Soil
Soil is made up of three basic components in various ratios:

  • Clay
  • Sand
  • Silt
You can plant directly in the ground or buy soil and put it in pots. Cannabis plants thrive in soil rich with organic matter, and they need good drainage. If you decide to plant directly in the ground, you’ll need to understand your soil composition and amend it accordingly.


Heavy clay soils drain slowly and don’t hold oxygen well, so they will need to be heavily amended. At least a month before you plant, dig large holes where you’ll be placing your cannabis plants and mix in big amounts of compost, manure, worm castings, or other decomposed organic matter. This will provide aeration and drainage, as well as nutrients for the plants.

Sandy soil is easy to work, drains well, and warms quickly, but it doesn’t hold nutrients well, especially in rainy environments. Again, you will want to dig large holes for your plants and add compost, peat moss, or coco coir, which will help bind the soil together. In hot climates, sandy soil should be mulched to help with water retention and to keep roots from getting too hot.


Silty soil is the ideal growing medium. It’s easy to work, warms quickly, holds moisture, has good drainage, and contains a lot of nutrients. The best silty soil is dark crumbly loam—it’s fertile and probably won’t need any amending.

If you really want to ensure good results and minimize headaches, you can get your soil tested, which is easy and relatively inexpensive. A soil testing service will tell you the makeup and pH of your soil, notify you of any contaminants, and recommend materials and fertilizers to amend your soil.

Step 5: Get Some Fertilizer
Cannabis plants require a large amount of nutrients over their life cycle, mainly in the form of nitrogen, phosphorus, and potassium. How you choose to feed them will depend on the composition of the soil and your own methods.

Commercial fertilizers aimed at home gardeners can be used if you have a good understanding of how they work and what your plants need. But a first-time grower might want to avoid these, particularly long-release granular fertilizer.


You can purchase nutrient solutions designed specifically for cannabis from your local grow shop, but they are usually expensive and can damage soil bacteria—they are generally composed of synthetic mineral salts and intended for indoor growing.

Organic fertilization takes full advantage of microbial life in soil and minimizes harmful runoff. There are many different natural and organic fertilizers available at local home and garden stores, like blood meal, bone meal, fish meal, bat guano, and kelp meal.

Start off with fertilizers that are inexpensive and readily available. Some of these materials release nutrients quickly and are easily used by the plant, while others take weeks or months to release useable nutrients. If done correctly, you can mix in a few of these products with your soil amendments to provide enough nutrients for the entire life of your plants.


Again, getting your soil tested can be very useful and will tell you how to amend your soil and what types and amounts of fertilizer you should use. If you are unsure how much to use, be conservative—you can always top dress your plants if they start to show deficiencies.

Step 6: Choose Your Containers
You may need to put all of your plants in containers if you don’t have great soil. Also, if you’re unable to perform the heavy labor needed to dig holes and amend soil, containers may be the only way for you to grow your own cannabis outdoors.

If you don’t have a suitable patch of earth to make a garden, containers can be placed on decks, patios, rooftops, and many other spots. If needed, you can move them around during the day to take advantage of the sun or to shield them from excessive heat or wind. You can also use common cannabis nutrients designed for indoor growing because you will be using premixed soil. This will take much of the guesswork out of fertilizing your plants.


However, plants grown in pots, buckets, or barrels will likely be smaller than those planted in the ground because their root growth is restricted to the size of the container. In a broad sense, the size of the pot will determine the size of the plant, although it’s possible to grow large plants in small containers if proper techniques are used.

In general, 5-gallon pots are a good size for small to medium outdoor plants, and 10-gallon pots or larger are recommended for big plants. Regardless of size, you’ll want to protect the roots of your plants from overheating during warm weather, as pots can quickly get hot in direct sunlight. This will severely limit the growth of your plants, so be sure to shade your containers when the sun is high in the sky.

Step 7: Give Your Plants Water
While outdoor cannabis gardens have the benefit of utilizing rain and groundwater, you will most likely need to water your plants frequently, especially in the hot summer months. Some giant cannabis plants can use up to 10 gallons of water every day in warm weather.

Growers who live in hot, arid places will often dig down and place clay soil or rocks below their planting holes to slow drainage, or plant in shallow depressions that act to funnel runoff toward other plants. Adding water-absorbing polymer crystals to the soil is another good way to improve water retention. Water your plants deeply in the morning so they have an adequate supply throughout the whole day.


If you live in a particularly rainy climate, you may need to take steps to improve drainage around your garden, as cannabis roots are susceptible to fungal diseases when they become waterlogged. These techniques include:

  • Planting in raised beds or mounds
  • Digging ditches that direct water away from the garden
  • Adding gravel, clay pebbles, or perlite to the soil
If you’re using tap or well water, it’s a good idea to test it first. This water can contain high levels of dissolved minerals which can build up in soil and affect the pH level, or it can have high levels of chlorine which can kill beneficial microorganisms in soil. Many people filter their water.


Plants grown in hot or windy climates will need to be watered more frequently, as high temperatures and winds force plant to transpire at a quicker rate.

Remember that over-watering is a common mistake made by rookie growers—the rule of thumb is to water deeply, then wait until the top inch or two of soil is completely dry before watering again. An inexpensive soil moisture meter is a good tool for a beginner.

Step 8: Protect Your Cannabis Plants
Without the ability to control the environment as easily as you can indoors, outdoor cannabis growers have to protect their plants from storms and other weather events that could damage or even kill plants.

Temperature Changes
Temperatures below 40°F can quickly damage most varieties of cannabis, so if you live in a climate where late spring or early fall frosts are a common occurrence, try using a greenhouse or other protective enclosure.


Wind Conditions
High winds can break branches and overly stress your plants. If your garden is located in a particularly windy spot or if you’re expecting a particularly heavy blow, set up a windbreak. This can be as simple as attaching plastic sheeting to garden stakes around your plants.

Rain
While helpful for watering your garden, rain is generally seen as a nuisance by cannabis growers. It can severely damage your crop and cause mold and mildew. You especially don’t want rain on your cannabis plants when they are flowering.

You can construct a DIY greenhouse or even just use plastic sheeting and stakes to build a temporary shelter over your plants when you know rain is on the way.

Pests
Protecting your cannabis garden from pests can be challenging. Depending on where you live, you might have to keep large animals like deer at bay by building a fence around your crop.

But the more difficult challenge is dealing with the vast array of crawling and flying insects that can attack your plants.

The best protection is to simply keep your plants healthy. Strong, vigorous cannabis plants have a natural resistance to pests that makes minor infestations easy to deal with. It’s also a good idea to keep your cannabis plants separate from other flowers, vegetables, and ornamentals, as pests can easily spread between them.


Examine your cannabis plants a few times a week with an eye out for pests. An infestation is far easier to deal with if caught early.

There are many organic pesticides designed for use specifically on cannabis, and beneficial insects are also a great option.


You should now have enough knowledge to successfully start your own outdoor cannabis garden. Cultivating and growing plants is an enjoyable and rewarding pastime, so remember, spend lots of time with your plants, and have fun!
 
Cannabis Seeds 101: All You Need to Know and More

cannabis-seeds-101-all-you-need-to-know-and-more.jpg


What Are Cannabis Seeds?
DINnIjkRwyJvNJ8kyBxg_Seeds-in-Spoon-2.jpg

Cannabis is a dioecious plant, meaning its female and male reproductive organs are found on separate individuals. Female cannabis plants are grown in an environment without males to produce what we find in medical and recreational stores: seedless, high potency marijuana flowers, traditionally known as “sinsemilla.”

In order to reproduce, the flower of a female plant must be pollinated by a male plant after which the female flower produces seeds. However, many varieties of cannabis can produce some male flowers alongside female flowers on the same plant, especially if exposed to environmental stressors or left to flower for a longer than normal period. This is known as the hermaphrodite condition, and sometimes these male flowers will produce viable pollen and self-pollinate the surrounding female flowers to create seeds.

Once the seeds are mature, the female plant begins to die, and seeds are either dropped to the ground where they germinate and grow into new cannabis plants the next spring, or they are harvested for processing into hemp seed oil, food products, or to be sown to become the next generation of plants.


What Are Feminized Cannabis Seeds?
U1wJKTTTUKwzrq0WJbMe_Seeds-White-Background.jpg

Feminized cannabis seeds are seeds that are produced by causing the monoecious, or hermaphrodite condition in a female cannabis plant. This is achieved through several methods:


Feminized seeds produce plants that are nearly identical to this self-pollinated (or “selfed”) female parent plant, as only one set of genes is present. This is sometimes referred to as “cloning by seed” and will not produce any male plants. However, most producers of feminized seeds do not go through the lengthy (and costly) process of identifying a completely stable mother plant for seed production. Many, if not most feminized seeds end up being hermaphrodites, which can result in flowers with seeds in them and reduced yields. Most experienced growers will not use feminized seed, and they should never be used for breeding purposes.

What Are Auto-Flowering Cannabis Seeds?
zAkfPxMER2exCkkKnFPm_Seeds-Table-Spoon.jpg

Most cannabis plants begin their flowering cycle when the photoperiod, or length of time they are exposed to light each day, is reduced to somewhere between 12 and 14 hours, regardless of the size or age of the plant. The species Cannabis ruderalis, however, will begin flowering once the plant reaches a certain age and does not depend on a change in photoperiod.

Some breeders have crossed the low-THC ruderalis with other more potent varieties to create auto-flowering strains. These strains will produce indica, sativa, or hybrid-like cannabis flowers that start blooming as soon as they reach maturity. This is desirable especially in northern climates where summers are short and cold, and wet weather comes early in the fall. Auto-flowering strains can be started in early spring and will flower during the longest days of summer to take advantage of the highest quality light available. Unlike clone mothers, auto-flowering strains cannot be kept in a vegetative state.


What Is the Difference Between Cannabis Seeds and Cannabis Clones?
3Xidf6e0QtqeyvvuEjVy_Clone.jpg

A clone is a cutting taken from a plant and then placed in some sort of grow medium to induce root production. Once it has rooted, it can be grown into a mature plant that is genetically identical to the one it was cut from.

Seeds carry genetic information from two parent plants that can be expressed in numerous different combinations, some like the mother, some like the father, and many presenting various traits from both. Creating identical cannabis plants using seeds is a very difficult and lengthy process. Generally, cannabis producers will plant many seeds and choose the best plant, and then take clones from that individual to grow their cannabis flowers, or simply start with a proven clone acquired from another grower as their mother plant.

Where Can I Buy Cannabis Seeds?
Yli15XNbSfujEz2BL55p_Seeds-in-Jar.jpg

Cannabis seeds can be found on numerous online seed banks, many of which are located in the UK, the Netherlands, Spain, and Canada, where the laws on selling cannabis seeds are much more lax than in other countries. It is illegal to bring seeds into the US and Customs will seize any cannabis seeds that they find in packages or on a person. In states that have home-grow provisions in their medical marijuana laws, you may purchase seeds at dispensaries. Seed banks are popping up in many of these states.


What Is the Legality of Cannabis Seeds?
mfCXf1FhQ1W36DMNiMk1_Large-Pile-of-Seeds.jpg

Depending on what state you live in, it may or may not be legal to sell, purchase, or possess cannabis seeds. In the United States, all cannabis seeds are considered illegal at the federal level.

Seed banks exist outside of the US and can sell them for “souvenir purposes,” but it is illegal to bring seeds into the US and Customs will seize any cannabis seeds that they find in packages or on a person.

What Makes a Cannabis Seed High Quality?
G85TAbCQT7aL2rMVsjFJ_Seeds-in-Spoon-Near-Bowl-2.jpg

There are several factors that go into determining whether cannabis seeds are high quality or not. First of all, they must be allowed to fully mature before harvest. Next, they must be properly stored as to not acquire mold or other pathogens that can spoil them. Seeds should be stored in a dark, cool place and used within 16 months, or frozen for future use.

The most important factor in seed quality is genetics. To grow quality cannabis, you need good genetics. Some less scrupulous breeders will simply cross a nice female with a random male and sell the resulting seeds. Other breeders will take their time crossing and backcrossing plants to stabilize the most desirable traits, while still producing an array of different phenotypes. This group represents most of the seeds on the market.

Really dedicated breeders have worked for years to create “inbred lines”, or IBLs, that will produce plants with very little noticeable difference. IBLs represent only a small fraction of the cannabis seed market, as they are generally used by breeders and not by cannabis producers.


How Do Cannabis Seeds Germinate?
Qrp4LHddQUupKNphqvPf_Germinate.jpg

In the wild, female cannabis plants drop their seeds as they die in the fall, then when the warmer, wetter weather of spring comes around, these seeds sprout and become new plants. Traditional outdoor methods used for centuries involve simply broadcasting seeds by hand onto cultivated fields.

There are many methods used by modern growers to germinate seeds. The easiest is to put the seed in a light potting soil mix covered by ⅛ to ¼ of an inch of soil. Keep the soil moist and relatively warm (50-70 degrees Fahrenheit) until the seed has sprouted into a seedling. Other techniques involve lightly scuffing the seed coat to ensure the seed is able to crack open, pre-soaking the seeds, and even germinating them in a wet paper towel until the epicotyl emerges and then gently planting them in the grow medium with tweezers. There are also popular products called starter plugs that consist of a small block of growing medium, often compressed peat or coco coir, with a small hole in the middle into which the seed is placed.


What Is There to Know About High-CBD Seeds?
DmHervMFTOmPEgzL6QIf_Seeds-in-Spoon.jpg

Cannabidiol, or CBD, is one of the chemical components (known collectively as cannabinoids) found in the cannabis plant. Lately much has been made of the potential benefits of CBD for treating the symptoms of many diseases and conditions. Through millennia of human selection for high THC content, cannabis with high levels of CBD has become exceedingly rare, as the genetic pathways through which THC is synthesized by the plant are different than those for CBD production.

Cannabis used for hemp production has been selected for other traits, including very low THC content, so as to comply with various drug laws. Consequently, many varieties of hemp plant produce significant quantities of CBD. As interest in CBD as a medicine has grown, many breeders have been breeding cannabis that has high levels of CBD by crossing drug species with hemp species; some of these hybrids have little or no THC, some have 1:1 ratios, and some that still have high THC contents along with significant amounts of CBD (3% or more).


Seeds for these varieties are now widely available online and through medical dispensaries. It should be noted, however, that any plant that is grown from these seeds is not guaranteed to produce high levels of CBD, as it takes many years to create a seed line that produces consistent results. There are breeders who are currently working on making seed strains with consistent CBD levels, but until these seeds are widely available, a grower who wants to produce cannabis with a certain THC to CBD ratio will need to grow from a tested and proven clone or grow many seeds out to maturity and have samples tested at a lab to determine the cannabinoid levels of each.

Why Are Cannabis Seeds So Expensive?
YTmmudQNRxCIS6c9bZIP_Expensive.jpg

Cannabis seeds generally sell for about $10-$12 each, a far cry from the $3 pack of tomato seeds you can buy at the local nursery. People are often quite taken aback when they find that a pack of 10 cannabis seeds can cost well over $100. It’s not hard to pinpoint the reason for this: prohibition.

The breeding of commercial crop seeds can be done in a relatively short time because of the enormous scale and abundant resources of commercial breeding programs. The general rule is that if you can grow more plants at once, it’s easier to locate and stabilize desired traits and is less expensive to produce massive quantities of seeds. Add to this new scientific methods of testing for desired traits using tissue cultures and lab analyses, and you have a great advantage over your average cannabis breeder.


Even larger scale cannabis grows are miniscule when compared to your average commercial agricultural seed production facilities. Cannabis breeders working under prohibition or strictly regulated legal environments are simply not able to work on this scale, and must take much longer, sometimes as long as decades, to produce a quality seed line. When you combine this restriction with the threat of potential legal consequences for breeders (many have spent time in jail), it becomes easy to see why cannabis seeds are so expensive. It should be noted that high cost does not always equal high quality, as the industry is unregulated.
 
6 Things Every Beginning Cannabis Homegrower Should Know

six-tips-starting-your-own-home-grow-1024x640.jpg

(Yarygin/iStocK0
Growing your own cannabis is an educational experience. It can be whatever you want it to be: a lifelong pursuit or a temporary diversion. As with any pursuit, you get out of it what you put in.


Not only do you develop hands-on cultivation skills, but you’ll also learn lessons that can be applied to just about anything. Crucial life skills like patience, forethought, restraint, and attention to detail all figure hugely into the cannabis cultivation process. As you develop confidence as a grower, you also may see the things you learn spill over into other areas of your life.

So, without further ado, here are the six things you’ll learn when you grow your own.


It’s Challenging
This shouldn’t come as a surprise for anyone who’s ever given cannabis cultivation a shot, but growing cannabis is hard. Sure, you can always leave a plant by your window or in a corner of your backyard and maybe it’ll get to flower, but you’ll almost certainly end up with a handful of larfy, wispy, stem-heavy buds.

If your goal is to produce the kind of chunky, frosted flower you see in magazines (or your favorite dispensary), you’re going to have to commit: read some books, buy the necessary equipment, and prepare to put in some real effort. Growing cannabis is a skill, and like any useful skill, it takes intention, seriousness, and effort. Take the process seriously, and you’ll reap the rewards.

But Not That Challenging
Once you’ve gotten a harvest or two under your belt, you’ll start to find that the elements of cannabis cultivation that seemed overwhelming or confusing at first will start to come naturally. The types of mistakes you made early on fade away, and you learn what works for you.

Of course, if you decide to scale up or take on new growing techniques, there will be a learning curve. Take them slowly. Tending your garden will become second nature. If you’re growing primarily for personal use, you’ll rarely see the bottom of your jar again. As long as you make sure your basic equipment is in order and you are determined, your skills and harvests will continue to grow.


More Doesn’t Always Mean Better
More powerful lights, more nutrients, and more technology means more flower, right? Well, not necessarily. In fact, thinking “more” can often get you into trouble.

Nutrient burn and nitrogen toxicity, which occur from nutrient overuse, can damage or even ruin an entire crop. Giving your plants too much light or putting them in proximity to lights that are too powerful can damage leaves and compromise plant health. Even overwatering can have nasty consequences, causing root rot. In cannabis cultivation, there’s no reason to go overboard.

Once you’ve found a process that works for you, stick with it, and only make incremental changes to dial in your process.


The Details Matter
There are a multitude of factors that play into cannabis growth and production and many of them won’t be immediately apparent to the novice grower.

When I set up my first greenhouse grow, I didn’t think to ensure I had proper airflow beyond keeping a couple vents open, which led to a lot of mold problems. In another example, a friend put together an exemplary grow setup, but didn’t seek out the best genetics, leading to a couple sad harvests before he wised up. It goes to show how seemingly small things can make a world of difference.

Success or failure may come down to something you never considered, so flexibility, ability to problem-solve, and attention to detail are a must.


Ask a Friend for Advice
There’s an enormous cannabis community you can draw on, either in-person or over the internet. If you want to maximize your chances of growing a great crop, become a part of the growing community.

No matter what issue you face, many others have inevitably gone through the same. If you have a question, ask your growing community for help—experience goes a long way. That can mean anything from checking out a message board to stopping by your local grow shop.

Don’t just stop at getting your question answered, though. Respect the community and learn if you can contribute to it yourself. The health and value of a community is defined by the people in it. Maybe someday you’ll run into someone with the same problem you had, and you’ll be able to keep the cycle going.


Patience Is Everything
The most essential ingredient in any cannabis harvest is patience. Patience is what makes you stick with it through the initial challenges, and it’s the safeguard to keep you from going overboard with excessive light or nutrients. It also ensures that you take the time to investigate little details like pest, disease, or poor yields, which can be the difference between success and failure.

And, of course, patience is what you need to keep from jumping the gun and harvesting your crop before its time. It’s easy to start harvesting before pistils stop growing and trichomes go cloudy, or stop curing before it’s perfect, but the few extra days will prove worth it in the end.

Practice patience and your shot at growing a successful crop will skyrocket.

With realistic expectations and a little preparation for the challenges you’ll no doubt encounter, going from seed to harvest can be as fulfilling and rewarding an activity as any you can find.
 
How to Increase Production of Ripe Trichomes on Cannabis

increasing-trichome-production-on-cannabis.jpg


For lovers of solventless cannabis extracts, most would agree that properly cleaned full melt hash is about as good as it gets. Sift of this quality looks like fine white sand, but upon closer review, little frothy orbs appear to look almost suspended in tiny cloud-like formations. Under a microscope, thousands of tiny trichome heads appear perfectly separated from their capitate stalks, picked like fresh berries in a basket. A very small pinch can be as aromatic as a cologne, hitting your nose with a barrage of aromas.


This quality of sift is the end product of a painstakingly orchestrated series of procedures that first began with an expertly grown crop of cannabis. Techniques used to grow cannabis at this level necessitate one central underlying principle: farming and preserving trichomes.

Trichomes Production: From Grow to Harvest and Beyond
uLzlyNuZRdGmLsxLmtPR_trichome-body-2.jpg

Trichome farming is more of a philosophy than a single practice. At its core, the concept can be dissolved down into two guiding principles: trichome proliferation and preservation. Together, they exist as a mantra for the production of the highest quality cannabis in the world. In every step of breeding, growing, harvesting, curing, extracting, and curing cannabis, trichome preservation and proliferation remain the two guiding forces for maximizing resin potential.

Trichome-Stacked Flowers Start with Genetics
12vknuD4SWCvUmGW09W4_trichome-farming-body.jpg

Achieving trichome-stacked flowers is a journey that begins first and foremost with proper genetics. Certain cannabis genotypes will yield higher concentrations of trichomes than others. Selective breeding and acquisition of genetics that express high desirable yield ranges is the only way to build a solid foundation for proper trichome production.


https://www.leafly.com/news/cannabi...pes-and-phenotypes-what-makes-a-strain-unique

When breeding sinsemilla cannabis for resin production, finding a stable mother to take cuttings from is key. Through asexual propagation, that mother can then be cloned and you can use the clones to grow plants that produce high-trichome yields.

Grow Habitat and Trichome Production
Yl4PANf1TJ2zvr8Ps1k4_trichome-farming-grow-conditions.jpg

After genetics, the next most important thing to consider when aiming to maximize resin production is the grow habitat. Although a certain genotype may be predisposed to heavy trichome production, unless given adequate growing conditions, their potency may be lacking.

Quantity of trichomes does not necessarily equate to cannabinoid and terpene production within the trichome head. These factors are greatly impacted by environmental influences that take place during a plant’s bloom cycle. Of the plethora of environmental factors that come into play when growing cannabis, variables such as light spectrum, nutrient uptake, watering cycles, temperature, humidity, and airflow will all have a considerable impact on resin formation and cannabinoid production.

Avoid Contact with Trichomes and Flowering Cannabis Buds
KK3qr6qtRBSX0TSRuf8D_trichome-farming-flower.jpg

Another very important consideration when farming trichomes is minimizing contact with the flowering buds. Trichomes are very sensitive and will burst on contact. Any physical interaction with cannabis flowers during the bloom phase will potentially compromise the integrity of the trichomes. If you must handle the colas, it’s very important to be as careful as possible. When harvesting, this same concept applies — any unnecessary agitation will cause a degradation in trichomes.

Heat and Trichome Production
vCVIVPACQUqX2k3pUoqx_trichome-farming-heat.jpg

Aside from physical interaction, heat is another major enemy to resin formation. When growing, keeping the temperatures as low as possible will help encourage production. It’s widely argued that in late stages of a cannabis plant’s bloom cycle, keeping temperatures low will trigger an increase in resin production. When harvesting, it’s also important to maintain a consistently cool temperature. Much progress can be lost if high levels of heat enters the equation at any stage in the growing, harvesting, and curing process.

An easy way to tell if heat if affecting your crop is to give them a good sniff. Disturbed trichome heads and those exposed to heat will give off pungent aromas. That delicious smell is nothing more than the degradation of trichomes as a result of heat and/or agitation of some kind.

Harvest Trichomes at the Right Time
a2gwYSzIRYe24bH7prTP_trichome-farming-trimming-harvesting%20(1).jpg

There are handfuls of folk remedies and popular anecdotes floating around on the internet for how to maximizing resin production. Ranging from light deprivation to plant mutilation (cutting or pricking your plants to stress them out), these tips and tricks range in efficacy. The most important thing to consider when exposing your plant to unusual conditions is to constantly check for signs that they are healthy.

In the final stages of a plant’s bloom cycle, a crucial factor when preserving trichomes is to harvest at the right time. With the help of an inexpensive magnifying glass, you can identify the color of a trichome’s glandular dome to help determine the perfect time to harvest. When trichomes are clear and translucent, they are not ready yet and are still producing valuable cannabinoids. As they begin to lose opacity and turn milky white, this is an indication that your plants are almost ready to go.


For maximum resin production and potency, harvesting when trichomes have moved from milky white to an amber hue is key. Like fruits, trichomes are at their peak of flavor just before they turn. As the color moves into a predominately amber shade, this should be a strong indicator that the trichomes have reached the apex of their development cycle.

In every step of the growing process, there are opportunities to make decisions in favor of resin production. For those looking for potent, trichome-stacked flowers, adopting some of these techniques aimed at trichome farming is essential. The preservation and proliferation of trichomes is contingent on the respect they are given during the growing and harvesting process. Adopting the philosophy of trichome preservation is essential to maximizing resin production, potency, and preservation. For hash makers, trichome farming is the only way to achieve superior quality. Without these practices, products like full melt hash simple couldn’t exist.
 
What Are the Best Nutrients for Growing Cannabis?

best-cannabis-nutrients.jpg


Updated 03/22/19

For the first-time grower, it can be a truly daunting task to select the best nutrients for their cannabis, and they’ll often spend far more money than they need to. With so many options to choose from that range from hydroponic to organic nutrients, new growers can quickly get overwhelmed. But with a little bit of knowledge about the requirements of cannabis plants and how they absorb and utilize nutrients, you can confidently select the products you need without breaking the bank.

Which Elements Does a Cannabis Plant Need?
7LAFQRRTVWJu0AHBHiDx_what-are-best-nutrients-growing-cannabis-elements.jpg

Your cannabis plant needs a main group of elements that are collectively referred to as macronutrients. Here’s a breakdown of the mineral and non-mineral elements you need to feed your plant.

Mineral nutrients obtained from the soil:

  • Nitrogen (N)
  • Phosphorus (P)
  • Potassium (K)
  • Calcium
  • Magnesium
  • Sulfur
Nitrogen
Nitrogen is mainly responsible for a plant’s development during the vegetative stage of its life. It’s an essential part of chlorophyll and without it, a plant can’t turn sunlight into energy and it won’t be able to grow.

Nitrogen is also part of the amino acids that act as building blocks for proteins in a plant. Without the necessary proteins, your cannabis plants will be weak and frail. Nitrogen is also a part of ATP, which allows plant cells to control the use of energy.

Nitrogen is also necessary to create nucleic acid, an essential ingredient in DNA or RNA, and without it, cells won’t be able to grow and multiply.

Phosphorus
Phosphorus is important for producing large, healthy buds. The key role of this element is to help make nutrients available for the plant to uptake. These nutrients than are used to build the structure of the plant as it grows from the roots to the flowers.

Without adequate phosphorus, plants will show signs of undeveloped roots and might not even flower. Early signs of phosphorus deficiency shows up as a purple hue in the veins of leaves.

Potassium
Potassium has a number of jobs that largely help to regulate the systems that keep a plant healthy and growing. It plays a large role in osmoregulation, the passive regulation of water and salt concentrations in the plant. Potassium accomplishes this by controlling the opening and closing of the stomata which is how a plant exchanges CO2, H2O, and oxygen.

Potassium also triggers the production of ATP, which works to store energy produced in photosynthesis by creating glucose. This glucose is then used as energy for the plant as it grows. Without sufficient potassium, you will see weak plants starved for energy that appear burnt because they are unable to successfully regulate the exchange of CO2, H2O, and oxygen.

Calcium
Calcium is responsible for keeping the structure of cell walls in a plant together. Without calcium, new growth won’t develop properly and the plant won’t function as it should. New growth will be stunted, leaves will curl, and rusty spots will show up on the plant.

Magnesium
Magnesium acts as the central molecule in chlorophyll and without it, plants aren’t able to generate the glucose from photosynthesis. No magnesium means no energy can be converted from sunlight.

Once magnesium has helped create glucose, it helps metabolize glucose to make it available for the plant to grow. Without sufficient magnesium, you will find yellowing leaves, with discoloration reaching the veins as well.

Non-mineral elements derived from air and water:

  • Carbon
  • Hydrogen
  • Oxygen


How to Use Nutrients
The three numbers shown on the front of fertilizer bags, nutrient solution bottles, or other additives indicate how much of the three main elements (nitrogen, phosphorus, and potassium) is available in the product. For example, a product that says “10-4-4” will contain 10% available nitrogen, 4% phosphorus, and 4% potassium by weight. These are always listed in the order of N-P-K.

All other mineral nutrients are grouped into the category of micronutrients, as they are used in much lower quantities. This group consists of the following elements:

  • Zinc
  • Iron
  • Manganese
  • Molybdenum
  • Chlorine
  • Cobalt
  • Silicon
  • Boron
  • Copper


While cannabis plants require very low concentrations of these elements to thrive, they are still vital to the overall health and growth of the plant.

Next, we’ll examine the main types of nutrients used by cannabis growers today as well as their proper application. Before you start growing, however, we highly recommend learning about the basic mechanisms through which plants absorb water and nutrients, osmosis and active transport.

Hydroponic (Soilless) Cannabis Nutrients
aJHEmHSTK43ZOwr4n8Cg_what-are-best-nutrients-growing-cannabis-soil-organics-hydroponic.jpg

Hydroponic growing is simply the practice of growing plants without soil, usually with some other sort of substrate like rockwool, clay pebbles, coco coir, or some sort of mix. Many of the premium “potting soils” marketed for growing cannabis are actually soilless blends. Most indoor cannabis growers are growing hydroponically, even if they’re using buckets of “potting soil” and hand watering each plant.

For this reason, the vast majority of the nutrients sold specifically for cannabis cultivation are hydroponic nutrients. These products are comprised of concentrated mineral salts, usually in liquid form but sometimes as powders, that are to be diluted in water to a level that is suitable for the plant.


Nutrients must be water soluble in order for the plant to absorb them. Liquid products are sold in two parts (usually labeled “part A” and “part B”) because they contain elements that will precipitate out of the solution if mixed together at a high concentration, making them unavailable. Combined in the correct volume of water, this is not an issue.

Products are also divided between “Grow” solutions, high in nitrogen needed for vegetative growth, and “Bloom,” high in phosphorus for flower development, because the cannabis plant has different nutritional needs during different stages of growth.

Great care should be taken when applying hydroponic nutrients, as overfeeding can lead to plant damage and even death. A general rule of thumb is to start at about 25% of the level recommended on the product label and gradually work up to full strength. Hydroponic nutrients are often used by soil growers with good results, but this technique is not recommended for the beginner.

Soil Nutrients and Organics for Cannabis
iQlS8dx5ROyaX0NWJRHH_what-are-best-nutrients-growing-cannabis-soil-organics.jpg

What sets soil apart from hydroponic media is the presence of non-inert organic matter like humus, compost, manure, and worm castings that contain many macro and micronutrients. Much of the nutritional value in these substances is locked up in non-soluble form, however, and must be processed by soil-dwelling microbes and fungi in order to be of use to the plant. Non-organic nutrients designed for soil growing are less common at the grow shop because they can quickly build up in the soil, harming the soil life as well as preventing the uptake of water and nutrients by the root system.

Organic fertilizers and nutrients for cannabis are far more forgiving; they usually contain less immediately soluble nutrients and more elements that are beneficial to soil organisms. The first-time grower who decides to use soil as their medium would be well advised to stick to organic fertilizers and nutrients.


The least expensive way to do this is to use things like blood meal and fish meal for nitrogen, bone meal and bat guano for phosphorus, wood ash and kelp meal for potassium, dolomite lime for calcium and magnesium, and epsom salts as a source of magnesium and sulfur. Most of these items can be purchased cheaply at your local home and garden center and then mixed in small amounts into the soil before potting. Done correctly, you’ll only need to water your plants and occasionally add carbohydrates to feed the soil life. There are also commercially available soil blends that already contain the proper mix of these types of ingredients.

Alternately, there are pre-mixed organic nutrient solutions you can buy that take the guesswork out of feeding your plants. These tend to be expensive, but the benefit is that you can simply follow the manufacturer’s feeding schedule and get good results.


The key to successful organic growing is cultivating a diverse and healthy population of soil microbes and mycorrhizae in the soil. Many premium soil blends come pre-inoculated with these organisms, and there are many (often expensive) additive products available that add additional life to your medium. However, the best (and cheapest) method of inoculating your soil is through actively aerated compost tea (AACT), something you can make yourself with just a few inexpensive items. By using this technique, you may find that you don’t need to add very much in the way of nutrients or fertilizers; the soil life will process the organic matter in the soil into nutrition the plant can readily absorb.

There are many ways to grow cannabis, and each has its benefits and drawbacks. Organic soil is more forgiving of mistakes and less than ideal conditions, but often produce smaller yields and slower growth. Hydroponics and synthetic nutrients can offer bigger yields and quicker flowering times, but require a great deal of attention and knowledge to be successful. The best advice for the beginning grower when selecting nutrients and fertilizers is to make sure you’re using products that are compatible with your technique and medium, as well as with each other. Doing a little research before your first grow can prevent wasted money spent on unnecessary products. Happy growing!
 
Your Guide to Drying and Curing Cannabis Buds

drying-curing-cannabis.jpg

After months of hard work carefully tending your plants, you’ve finally harvested a crop of frosty, fragrant cannabis buds that you just can’t wait to try. But first, they need to be dried. While you may be tempted to dry your cannabis as quickly as possible, curing, a prolonged process of removing moisture from the flowers under controlled environmental conditions, will provide a much better product for multiple reasons.


Proper Cannabis Curing Increases Potency
Cannabis plants produce tetrahydrocannabinolic acid (THCA) and other cannabinoids through a process called biosynthesis, in which certain compounds are gradually converted into new blends. For example, THCA becomes the main psychoactive compound in cannabis, THC.


This process doesn’t completely stop the second you cut down your plant; if you keep freshly harvested cannabis in temperatures between 60 and 70°F and humidity level between 45-55%, the conversion of non-psychoactive cannabinoids to THCA will continue and your buds will gain potency. Quick drying under warm, dry conditions halts this process much faster.

Curing Affects Flavor and Quality of Smoke
Many of the aromatic compounds (terpenes) that give cannabis its unique smell and flavor are quite volatile, and can degrade and evaporate at temperatures as low as 70°F. A slow cure at low temperatures will preserve these terpenes better than a quick, hot cannabis drying process.


These conditions also create an optimal environment for enzymes and aerobic bacteria to break down leftover minerals and the undesirable sugars produced by the decomposition of chlorophyll during the drying process. The presence of these sugars and leftover minerals is what causes the harsh, throat-burning sensation you get from smoking improperly cured cannabis.

Curing Preserves Your Cannabis
A proper cure allows you to store your cannabis for long periods without worrying about mold or the loss of cannabinoid content. Well-cured flowers can be stored in an air-tight container in a cool, dark place for up to two years without significant loss of potency.


How to Dry and Cure Your Cannabis
WHWIsecwRsaohU1p4jun_curing-101-body-new.jpg

There are many ways to cure cannabis buds, but most people use a variation of one popular method. Although you can freeze dry, water cure, or even dry-ice cure your buds, we are going to focus on the easiest and surest way to get the best results from your harvest.

Initial Cannabis Drying
How you complete this step will depend on how you harvest your cannabis. The most popular way is to cut 12-16” branches from the plants, remove unwanted leaves, and then hang the branches from string or wire. Some growers cut and hang whole plants, while others will snip buds from branches and place them on cannabis drying racks. You may fully manicure your flowers before drying, or wait until after.

Regardless of which method you prefer, you will need to keep the harvested cannabis in a dark room with temperatures kept within the 60-70°F range and humidity between 45-55%, with a small fan to gently circulate the air. This is crucial to preserving the flavor and aroma of your harvested bud in the finished product, so it’s recommended that you have a dehumidifier, A/C unit, or another method for ensuring that conditions stay in this range.


When the flowers feel a little crunchy on the outside and the smallest branches snap when you bend them rather than fold, you’re ready for the next step. Depending on the density of the flowers and the environmental conditions, it can take anywhere from 5 to 15 days for the initial drying to be complete.

Final Cannabis Cure
Once you have determined that your cannabis buds are mostly dry, it’s time to cure them.

Step 1: Manicure your buds and separate them from the branches, if you have not done so already.


Step 2: Place the trimmed buds into some type of airtight container. Wide mouth quart-size canning jars are the most commonly used container, but you can use ceramic, metal, wood, or plastic vessels as well. Some people use oven bags, which are perfectly fine, but most plastic bags are unsuitable for curing as they are not impervious to oxygen and can degrade when they come in contact with certain terpenes found in cannabis. Pack the flowers loosely into your containers, filling them all the way to the top without compacting or crushing the buds.

Step 3: Seal the containers and place them in a cool, dry, dark spot to finish the curing process. Within the first day, you will notice that the buds are no longer crunchy and dry on the outside, as moisture from inside the flowers rehydrates the outer portions. If this is not the case, you have over-dried your cannabis.

Step 4: During the first week, open the containers several times per day and let the flowers “breathe” for a few minutes. This allows moisture to escape and replenishes the oxygen inside the container. If you notice the odor of ammonia when opening a container, it means the buds are not dry enough to be cured and anaerobic bacteria are consuming them, which will lead to moldy, rotten cannabis. After the first week, you will only need to open the containers once every few days or so.


After 2 to 3 weeks in containers, your cannabis will be cured enough to provide a quality experience, but 4 to 8 weeks of cure time will improve it even more. Some strains benefit from 6 months or more of curing.

The curing process is possibly the most overlooked aspect of cannabis production, one that was all but ignored when the black market was our only option. Due to competition in the medical and recreational cannabis markets, more producers are paying attention to this process that turns a decent product into a truly excellent one, and now you can do the same with your homegrown flowers.
 
The Secrets of Colorful Cannabis Revealed: Here’s Why Some Strains Turn Purple
the-secrets-of-colorful-cannabis-revealed-heres-why-some-strains.jpg

Environment and genetics both play a role in the coloration of a plant. But what exactly causes each variety to look the way it does? What gives Black Cherry Soda its otherworldly color of dark purple with vibrant orange hairs cutting through it like streaks of fire? Today we’ll explore the color of cannabis, examining which factors influence its coloration, why some strains are more vibrant than others, and whether purple = potent.


How Do Genetics Influence Cannabis’s Color?
In order for plants to express vibrant non-green hues, they may need the genetic building blocks to do so. These building blocks are called anthocyanins, which are a family of flavonoids that provide purple, red, or blue pigments (also found in blueberries, eggplants, red cabbage, concord grapes, violets, and other richly-colored plants). Some cannabis strains naturally contain higher levels of anthocyanins than others. Ever notice some of your favorite strains tend to express the same colors over and over again? Granddaddy Purple, for example, seems to always carry swirls of deep purples and pastel lavenders. This alternative coloration is indicative of the strain’s predisposition to high anthocyanin levels, and it’s certainly a quality some cannabis breeders attempt to select for and coerce, if only to make us consumers ooh-and-ahh over pretty colors (hence the long line of “purple” strains that includes Purple Kush, Mendocino Purps, Purple Urkle, and many others).


Which Cannabis Strains Tend to Turn Purple, Blue, and Red?
There are many strains that contain a genetic predisposition for high anthocyanin levels, and you’ll often find them under monikers that begin with colors like purple, red, blue, or pink. No, this doesn’t mean these strains will always show off fancy hues, but they have a higher potential of doing so if conditions are right.

Plants with low anthocyanin may produce a different array of colors in the final weeks of flowering, due to another family of molecules called carotenoids. These are responsible for the earthy gold and yellow hues buds can take on before harvest as chlorophyll shuts off.


How Does Cannabis Go from Green to Purple?
As you might remember from your elementary biology classes, chlorophyll is what gives plants its green color. Chlorophyll is vitally important to the photosynthesis process by which plants absorb sunlight for energy. As cannabis plants mature, they produce less of the dominant pigment chlorophyll and we begin to see those anthocyanins emerge in a show of purples, reds, and blues. Growers should note that there are specific environmental conditions that trigger the halt of chlorophyll production. We’ll get into that shortly.


What Other Environmental Factors Affect Cannabis’s Color?
Although not all cannabis strains will express purple, blue, or red hues in their lifetime, those equipped with the right genetics may do so under certain environmental conditions. The reason why cannabis produces flavonoids and anthocyanin, researchers have observed, is for protection. “Flavonoid accumulation [is] involved in many aspects of plant growth,” the study authors wrote, “including pathogen resistance, pigment production, and protection against ultraviolet radiation, which contributes to the growth of pollen and seed coat development.”

Information on anthocyanin production in cannabis is limited. What we do know comes largely from cannabis cultivation experience and studies measuring patterns of anthocyanin production in other vegetation.

First, there’s temperature. Purple, red, and blue hues may appear in response to drops in temperature, since chlorophyll production takes its natural pause in autumn as the days become colder. Research on other fruits and flowers noted that higher temperatures destroy anthocyanin production. That same study also found that higher pH levels lead to the destruction of anthocyanin pigments, meaning they tend to thrive in more acidic environments.


The pH level determines which pigment the plant takes on:

  • Acidic environments tend to induce red and pink coloration
  • Purple coloration occurs in neutral pH environments
  • Blues become present with higher pH levels
  • Yellow is developed in alkaline conditions
Are Purple Cannabis Strains More Potent?
They might be more eye-catching, but purple strains are not necessarily more potent than their green relatives. A purple-blossomed plant exposed to cold temperature may actually produce less THC, so it’s important to keep in mind – as Robert Clarke aptly puts it in The Cannabible – that “many traits prove to be desirable only in certain varieties under certain conditions.”
 
What Are the Strongest Cannabis Strains?

Looking for a cannabis strain that will challenge your tolerance or stand up to stubborn medical symptoms? Readers ask us all the time which strains are the most potent, and while that depends on a variety of factors from growing techniques to phenotypic variation, we’ve put together a list of strains that tend to deliver potent euphoric effects thanks to strong genetics and selective breeding.

While THC is the main driver of potency, it’s important to understand the important role terpenes play in enhancing and shaping the strain’s high. Terpenes like myrcene, linalool, and limonene refer to aromatic compounds that lend cannabis its unique array of smells, and a cannabis strain rich in both terpenes and THC often delivers a more remarkable experience than a product that lacks chemical diversity.


A Selection of the Strongest Cannabis Strains
Below are the mean THC levels of a few cannabis strains featured in this list. Note that these represent their average potency across several testing labs; you’ll undoubtedly come across samples with higher or lower THC levels in your own strain exploration, but this gives you a baseline idea of how these strains compare.

Note: You can filter “potent strains” on dispensary menus to see if any of these recommendations are available near you.


Potency data derived from six of the largest testing labs in Washington State. Click to enlarge. (Elysse Feigenblatt/Leafly)
GSC (f.k.a. Girl Scout Cookies)


Find GSC Nearby

GSC (f.k.a Girl Scout Cookies) hauled its way up the ladder of fame in recent years, and it isn’t hard to see why. The genetics in this hybrid are strong, with a THC content that regularly tests above 20%. Expect a crushing wave of blissful euphoria that enshrouds both mind and body with warm relaxation for hours.

Leafly User Review:

“Incredible jelly foot. Very nice body pudding. Creativity mixed with amazing peaks of HD colors.” –herbknight

Kosher Kush


Find Kosher Kush Nearby
Kosher Kush first blessed the world with its presence in 2010 and has been nabbing Cannabis Cup awards ever since. Its genetic background may be a mystery, but this indica’s keepers at DNA Genetics have refined a champion strain that consistently breaches 20% THC. Wrapped in a thick blanket of crystalline resin, you’ll hardly need a closer look to see that this tranquilizing indica is not one for the novices.

Leafly User Review:

“I can’t feel my face… or my arms, or my feet, or anything for that matter. It’s as though I’m a weightless entity with a somewhat foggy-consciousness, floating on the patio.” –ricegrain

Ghost OG
Gok.png


Find Ghost OG Nearby
Hiding in a white cloak of crystal resin, Ghost OG is a strain that is bred for its high-octane euphoria. Said to be a cut off the original OG Kush, Ghost OG’s potency is toned by a symphony of terpenes that fuel this strain’s powerful THC engine. Find a comfy seat and prepare to be swept into a powerful, euphoric current perfect for relaxing.

Bruce Banner


BruceBanner_Terpenes.png


Find Bruce Banner Nearby
Bruce Banner, appropriately named after the Hulk’s alter ego, is a heavy-duty hybrid with a staggering THC content. Rated the strongest strain in 2014 by High Times following its victory in the 2013 Denver Cannabis Cup, Bruce Banner has since carved itself quite the reputation. Powered by OG Kush and Strawberry Diesel genetics, Bruce Banner delivers a dizzying punch of euphoria that anchors your body in deep relaxation.

Ghost Train Haze
GhostTrain_Terpenes.png


Find Ghost Train Haze Nearby
In the last few years, the Cannabis Cup leaderboards saw a new rising star: the lively and vigorous sativa known as Ghost Train Haze. Bred by Rare Dankness Seeds, Ghost Train Haze had the highest THC content of any 2011 Cannabis Cup submissions, weighing in at 25.5% THC. Inheriting genetics from Ghost OG and Neville’s Wreck, this sativa’s potency takes form in a jolt of euphoric energy that goes straight to the head, feeding focus and creativity.

Leafly User Review:

“My initial response was yelling. It’s almost unreasonably potent. Smooth and citrusy too, but potent. Did I mention it was potent? It was potent. A next-level sativa. Made me feel like a marijuana n00b up until now. CAREFUL, it’s potent.” –thepiginzen

Chemdawg
Cd.png


Chemdawg is a classic strain whose unforgettable potency keeps a vice grip on its fan base. Ripe with the scent of acrid fuel, Chemdawg delivers an unforgettable flavor profile alongside its invigorating euphoria, inviting creativity alongside firm stress relief.

Leafly User Review:

“I feel like I’m in gravy and it’s a real good time.” –powwow31

GG4
GG4_Terpenes.png


Find GG4 Nearby
GG4 is named for the stickiness of its resinous buds, and this hybrid certainly lives up to her name. It isn’t rare for GG4 to hit the mid- to upper-twenties in a potency analysis, and she’s got multiple Cannabis Cup awards to back that claim up. But we doubt you’ll need the proof when this hybrid’s got you gorilla-glued to the couch in stupefied contentment.

The White


Find The White Nearby
Named for the whiteout of crystal resin cloaking her buds, The White has become a godsend for breeders looking to improve the potency of their genetics. Routinely testing between 20-28% THC, The White delivers a disorienting blizzard of euphoric delirium that commands relaxation.

Death Star
DeathStar_Terpenes.png


Find Death Star Nearby
With a THC profile that typically dances between 20-24%, Death Star will surely wreak as much havoc as the Galactic Empire. Using its great psychoactive forces, this Sensi Star and Sour Diesel hybrid commands you to chill out as it imposes powerfully euphoric and sedating effects.

Leafly User Review:

“There’s no hiding the high with Death Star. We went Christmas tree shopping in the bitter cold. It took us about 45 minutes to pick out a tree…it ended up being the very first tree we saw. Then went to a bar and I confused a mirror for a window.” –hoobear

White Fire OG


Find White Fire OG Nearby
Born from The White and Fire OG, White Fire OG (also known as WiFi OG) is a force not to be trifled with. Testing data shows the impressive THC potential of this hybrid, with average levels falling between 22-29%. Its uplifting effects launch your mood into the clouds, an elevated feeling that will shake creativity and happiness wide awake.

Explore More Potent Cannabis Strains
Can’t get enough potent, high-THC strains for your stash jar? Here are a few more heavy-hitters for you to seek out at your next dispensary visit.

 
Beginner’s Guide to Cannabis Breeding, Genetics, and Strain Variability

beginners-guide-to-cannabis-breeding-genetics-and-strain-variabil.jpg

Among all the colorful cannabis strain names on the shelves at your local shop, some crop up more than others: OG Kush, Sour Diesel, Blue Dream, GSC (f.k.a Girl Scout Cookies)the list goes on. You could assume, rightly, that these are some of the best, and therefore most popular, genetics on the market. Truly great strains earn a reputation with growers and consumers through reviews and word of mouth, with the best-of-the-best earning regional, national, and even international name recognition.


If you’ve become a fan of a particular strain and have acquired it from different sources over a period of time, you’ve probably noticed a distinct lack of consistency. There may even be times when a particular sample bears little or no resemblance to the strain know and love. Of course, differences in growing techniques, environment, and light conditions play a significant role in how flowers turn out. But given the exact same genetics, most skilled growers are able to produce results that at least are recognizable as the same plant. Why, then, is it so difficult to find consistency among different samples of the same strain? Answering that requires a dive into the murky waters of cannabis genetics and breeding.

Why Is There So Much Variability Between Strains?
Every spring, hopeful gardeners head to the hardware store to pick up packets of tomato seeds with names like Early Girl and Oregon Spring, visions of bountiful harvests of juicy crimson fruit dancing in their rain-drunk brains. While the outcome is hardly guaranteed, one thing is assured: All the plants grown from a pack of seeds will produce fruit of the same general size and flavor. In the cannabis world, this just isn’t the case.


Tomatoes, as well as most other garden vegetables, are monoecious plants, meaning they have both male and female organs on a single plant. The cannabis plant is dioecious; it has separate male and female plants, the female being the one cultivated for its THC-laden flowers. Dioecious plants are more complicated to breed, because you have to pollinate a female plant with a male plant. Seeds generated from cross-pollination of two plants present more genetic variation than seeds generated through self-pollination. With tomatoes, a staple food crop, breeders have dedicated considerable resources to breeding the fruit for commercial and home cultivation since 1940. Teams of scientists have spent years developing single varieties, selecting for traits such as size, flavor, pest-resistance, and drought-tolerance. Almost without exception, they’ve bred for uniformity as well.

Stabilizing Cannabis Genetics
Some cannabis breeders have also spent years breeding and crossing plants, often starting with a popular clone-only strain, in an effort to create a seed-based strain that expresses the traits of one of the parents. Even those efforts, though, yield some amount of variation across specimens. You could sprout ten seeds, and each will produce a plant that is slightly different in some way. The best of these seed strains are quite expensive and highly sought-after by commercial growers, who will often sprout 100 or more seeds of a single variety in order to find a plant that truly represents what the breeder intended.


The vast majority of seed breeders don’t even attempt to create a uniform strain. Instead they’re simply after a stable genetic line, called a hybrid. These make up a large number of the popular strains grown today, and it can take hundreds, even thousands of seeds to find one that expresses all of the desired traits. Unless a grower can locate an actual cutting of an original strain, it’s challenging and time-consuming to produce the “right” genetics. There’s always the temptation to sprout just a handful of seeds and sell the resulting product under a popular name, regardless of whether it is a good representation of the strain.

Murky Histories
Until recently, growing cannabis has been almost entirely an underground activity. As such, the development of today’s most popular strains has largely gone undocumented. A Google search on the histories of Sour Diesel and OG Kush brings up colorful stories of Grateful Dead shows and dudes named P-Bud and Chem Dog, as well as hours-long podcasts on the subject—but no positive proof of their origins. Plants were passed around the U.S. and even Europe by seed and by clone from as early as the 1980s and ’90s, and have been kept alive since then through breeding and, allegedly, even as original cuttings. At this point in time, it is impossible to determine whether or not a particular example of OG Kush or Sour Diesel is a true descendant of the original.


Now that cannabis is emerging from the underground, genetic testing should eventually make it possible to pinpoint a strain and even determine its geographical lineage.
 
Growing Cannabis Indoors vs. Outdoors: 3 Key Differences
indoor-vs-outdoor-cannabis-growing-3-key-differences.jpg


Cannabis has long been cultivated outdoors and is one of the oldest agricultural crops in existence. Growing cannabis indoors, however, has been around for less than a century and came about as a result of prohibition. Most advancements in cannabis production have occurred during the era of indoor cultivation; staying out of sight was initially a way to protect the grower from the laws against cannabis.

As technology advanced, the industry was able to expand its knowledge of the plant by leaps and bounds, and this was also true for areas where outdoor farming managed to succeed, like Southern Oregon and Northern California. The differences are not only important to aspiring cannabis farmers, but to the consumer comparing outdoor and indoor grown products at the dispensary counter.

How does the environment affect the outcome of a strain, and what considerations must a grower make when choosing between the two?

Controlled vs. Natural Climates
AekuTVxgS0Klvfli3l6X_cannabis-grown-indoors.jpg

There are many reasons to grow indoors over outdoors, such as being free to choose your location with minimal constraints and the ability to completely control your grow environment. Controlling temperature, light source, CO2 production, and humidity creates a stable habitat to optimize your plants’ growth without having to risk outdoor elements.

The indoor grower typically finds cosmetically pristine flowers with higher THC percentages. On the other hand, no bulb can produce the same spectrum of light unique to the sun which, in turn, limits indoor gardens with smaller yields and less vigorous plants. Outdoor farming, however, requires a climate suitable for cannabis production—good sun exposure, hot days, warm nights, and low humidity.


Nevertheless, growing indoors has complications as well. When the grower tries to create a natural environment indoors, there are factors in the natural process that cannot be replicated. For example, plants grown outside have substantial help against mites from natural predators who share the habitat. Wasps, ants, and ladybugs are some of “nature’s helpers” that keep mite populations at bay.

Indoors, the grower cannot hope to completely mimic the incredibly complicated natural environment. If mites appear in an indoor grow space, they can be a challenge to control. With the ever-increasing consumer concerns about the overuse of pesticides and insecticides, some cultivators might find the trade-offs of growing outdoors worth investigating.


Price of Growing Cannabis Indoors vs. Outdoors
Ms3Q4qQQ6Sosrleuu6mY_cannabis-buds-and-money.jpg

Both indoor and outdoor grows demand substantial up-front costs, but the difference becomes apparent long-term. Indoor climate control systems can cost a small fortune to operate, whereas a majority of the costs associated with outdoor grows are in the startup of the operation.

Labor costs for indoor and outdoor gardens also vary drastically. With continual turnover in an indoor garden, there’s always work to be done. Pruning, trellising, watering, feeding, and harvest work are ongoing and more demanding for smaller yields. Outdoors, the grower is working one crop throughout the season. Many outdoor farms with large outputs can operate with up to four employees full-time until harvest, when additional workers need to be brought in.


The high costs of indoor farming may be recouped through breeding projects, year-round harvests, and potent products that have higher selling points. Furthermore, manufactured indoor environments allow growers to cultivate strains that would otherwise be unsuitable for their local outdoor environment and climate. However, with the rising cost of energy and an increasing demand for more flower in the marketplace, outdoor farming may be able supply the market with quality products at a more reasonable price.

Quality of Cannabis Grown Indoors vs. Outdoors
RmBetLb9QciITNB9YrGF_pile-of-cannabis-buds.jpg

Indoor flower has long been recognized as the top-of-the-line product. Being able to control your environment and expedite breeding has resulted in aesthetically beautiful strains with magnificent flavor profiles. Introducing higher CO2 levels than in the natural environment increases bud growth and produces THC levels that are difficult to obtain outdoors.

Additionally, indoor cannabis does not have to deal with rain, wind, or any of the other natural elements that can damage an outdoor crop. The buds remain in pristine condition and only start to degrade once handling begins. The scale of most indoor operations generally allows for crops to be harvested in peak conditions and for the product to be cured in a controlled climate.

grobox-1-1024x640.jpg

A cannabis plant under LED lights. (Courtesy of GroBox)
Outdoor flower is, of course, subject to the whims of the natural environment. Though the end product may not look as perfect, the taste, effects, and aroma should still be there. Some consumers find sun-grown organic cannabis to be preferable to the cosmetically pristine indoor alternative.

Many stereotypes about outdoor cannabis exist for one key reason: legality. A large majority of outdoor cannabis seen by consumers has gone through a gauntlet of post-harvest abuse. Partly due to conflicts between state and federal law, many outdoor cannabis farms have to take risks to cultivate their product. As a result, oftentimes the harvest is rapid, curing is nearly non-existent, and aggressive handling is necessary to get it to market. As the laws change and outdoor facilities are able to take their time in processing, the market should see an increase in quality from outdoor grows.


Recently there has been an emergence of commercial greenhouse farming that strikes a balance between the two methods. This style of farming is producing quality results, which is exciting to see in this emerging industry. As we have seen, all styles of farming offer positives and negatives, and as a consumer or a producer, it’s always important to continually educate yourself. Step outside of your routine to try something new, and keep an open mind.
 
Four Steps to Picking the Right Grow Lights

four-steps-to-picking-the-right-lights.jpg


Between fluorescent, HIDs, and LEDs, cannabis growers have many different grow light options which may be difficult to distinguish between. We solicited the help of Cole Johnstone from Solid Apollo, a Seattle company which specializes in LED lighting, to help answer some of your questions and give us the low-down on grow lights.

Here are a few key things you should know before you buy:

1. Pick Grow Lights That Are Full Spectrum
4bDQBoudT1yK2liXei7a_medium_5177358991.jpg


In order to properly photosynthesize (use light to produce energy to feed themselves), plants rely on different wave lengths of light. Most plants can grow as long as they are exposed to some form of light, but they will grow much better when they have access to a wide spectrum of different wave lengths.

Cole says:

“Indoor cultivation can definitely be quite tricky and requires an investment in good soil, temperature control, fertilizer, pest control, and watering. Lighting is indeed a big part of the equation, with LED lights adding a sigh of relief into any grow operation.

“A single LED can be fine-tuned to any wave length or in a spectrum such as a “white LED.” This means you can have coverage through infrared, ultraviolet, and visible light. An LED grow light, which has dozens of individual spectra, can provide the exact light a plant requires.

“Many LED grow lights can be set up on a simple wall-timer in whatever cycle your specific plants need. Our lights are full spectrum, meaning the only change required for flowering would be to shorten the daylight cycle your grow light is on, from, say, 8 to 12 hours.

“Other lights sources, such as HPS, Fluorescent, and Metal Halide lamps, produce large amounts of heat. They also have a banded spectrum that doesn’t cover all of what plants need to grow properly, as well as putting off large amounts of green light, while Solar Core Grow Lights, the brand that we sell at Solid Apollo, don’t waste energy in producing unnecessary spectra.”

2. Pick Grow Lights That Use Less Energy
8pq57EeeSiSE3bY744g5_large_5056770838.jpg


Grow lights will need to be on for up to 12 hours a day. This means your energy bills will skyrocket, but some of the costs can be lessened by picking the right lights.

Cole says:

“Everyday LEDs are becoming more universal and accepted in all areas of lighting. They are low power, high brightness, and environmentally friendly. For these reasons alone, many growers are turning to LEDs to save from the traditionally high costs that have been associated with indoor growing. Saving money really grabs the attention of someone with a large growing business.

“When used for 12 hours a day, 365 days a year, an LED chip can easily last for 10 years. The chips we use in our lights, for example, are rated for 50,000 hours, and usually last longer than that. Even the best fluorescent tubes, which are very efficient as well, only last up to 20,000 hours. The efficiency of LED chips is partially based on the color they produce, with Red LEDs being nearly 97% efficient.

“We estimate LEDs are up to 70% more efficient than HPS grow lights based upon initial costs (ballast, heat control, tubing), lifespan, durability (breaking bulbs, etc.), and energy costs.”

3. Pick Grow Lights That Are Lower Maintenance
cykBS76R5bg2ieKaToaw_medium_6111678986.jpg


Not only do lights cost quite a bit of money, you’re also better off buying lights that you won’t have to fuss with every other week.

Cole says:

“The lights we manufacture are plug-n-play (plug it in and walk away) and require no maintenance other than ensuring they are mounted properly, and adjusting the height as your plants grow. LED lights do not require replacement ‘bulbs’ like typical HPS and Metal Halide. Also, LED chips don’t dim throughout their lifetime and will produce the same amount of light for, as said before, at least 50,000 hours. They can literally last a lifetime of growing.”

4. Ask Before You Buy
IdGMBgTQ9qlpmsfDRJgM_medium_22565509.jpg


Whether you’re a home grower or a major producer, purchasing the proper grow light system will require some serious dough. Before you buy, there are a few key questions that potential buyers (LED or not) should be asking companies.

Here’s what Cole thought our readers should know:

• What is the warranty on your lights?
• Do you offer a money-back guarantee?
• Are your lights full spectrum?
• How can I best configure your lights for my grow operation?
• Are you local so I can come to you with any concerns I may have?
• Are you knowledgeable about growing in general?

Said Cole, “Solar Core Grow Lights have a 120-day money back guarantee and a 5-year product warranty. We wouldn’t offer these guarantees unless we were very confident in our lights. We also designed these lights for a variety of applications, from simple indoor grow to greenhouse growing and for modular formation. Other companies should be held to the same standards.”
 
The Best Cannabis Strains for Pain

leaflypain-1024x647.jpg

(Gillian Levine for Leafly)
One of the most common applications for medical cannabis is pain, whether it’s inflammation, headaches, neuropathic pain, muscle soreness, spinal injury, fibromyalgia, or cramps. Patients have seen varying degrees of success with cannabis in treating pain-related ailments, depending on the type of pain, the intensity, and the individual’s own physiology.


This guide is informed both by user-submitted strain reviews and chemical profile data, as certain cannabinoids and terpenes are known to have areas of specialization such as pain. Because every person’s experience is so nuanced, we recommend sampling several of these suggestions and maybe even experiment with them in different forms, like topicals, oils, or even transdermal patches. Smoking and vaporizing are great ways to get the plant’s painkilling properties quickly, but read up on non-smoking consumption methods and cannabis concentrate alternatives to get an idea of the full spectrum of options available to you.

Cannabis Strains That Help With Generalized Pain


Find ACDC Nearby
All hail ACDC, one of the most effective painkilling strains out there due to its one-two punch of cannabinoids CBD and THC. As a general rule, cannabis strains with high amounts of both THC and CBD tend to make the best pain medicines, and there are plenty of high-CBD strains out there offering similar chemical profiles as ACDC.


Find Blackberry Kush Nearby
Blackberry Kush is a heavy THC-dominant strain that wraps the mind in dreamy, blissful euphoria while lifting pain from the body. With the exhale of its sweet, berry flavors, it’s easy to sink into a new mindset—one that isn’t dominated by throbbing aches and pains.

Browse more strains suitable for generalized pain.

Cannabis Strains That Help With Inflammation and Arthritis


Find Harlequin Nearby
Looking for cannabis that will quiet the roar of pain without a foggy mind? Try out the high-CBD strain, Harlequin. Its uplifting and clear-headed effects set it apart from heavier, more intoxicating options and make it a perfect choice for daytime medicating.


Find Blue Widow Nearby
Blue Widow is a prolific hybrid cross between parent strains Blueberry and White Widow. Leafly reviewers praise Blue Widow for its anti-inflammatory qualities, and perhaps the reason for this is Blue Widow’s rich terpene profile that typically boasts high levels of caryophyllene alongside a hearty cannabinoid content.

Browse more strains suitable for inflammation and arthritis.


Cannabis Strains That Help With Headaches and Migraines


Find Purple Arrow Nearby
Purple Arrow hits the target somewhere between heavy pain relief and uplifting euphoria, making it a great choice for headache sufferers needing swift relief without overly sedating effects.


Find Blueberry Headband Nearby
Headband hybrids are commonly described as “cerebral” with effects that go straight to the crown of your head. Blueberry Headband lives up to its name, delivering focused headache relief and a sweet berry flavor.

Browse more strains suitable for headaches and migraines.

Cannabis Strains That Help With Cramps


Find Redwood Kush Nearby
With effects that relax tension in both mind and body, Redwood Kush is known to deliver a woody forest aroma alongside hefty amounts of THC to help ease muscle cramping.


Find Dynamite Nearby
Dynamite is another high-THC strain that blows pain and cramping out of the water, but be wary: Dynamite is also known to incite the power of the munchies.

Browse more strains suitable for cramps.

Cannabis Strains That Help With Spinal Injury Pain


Find Cataract Kush Nearby
Cataract Kush is a heavy-hitting hybrid cross between powerhouse classics LA Confidential and OG Kush. This strain’s potency may not be for the novice consumer, but it’s perfect for patients needing a strain that can expertly annihilate pain associated with spinal injury.


Find Mazar I Sharif Nearby
Descending from some of the earliest landraces of Afghanistan, Mazar I Sharif is a relentless painkiller with a potency you can see on her heavy blanket of crystal trichomes. Afghani strains have a reputation for their high cannabinoid contents, so it isn’t hard to imagine that so many patients have found relief from stubborn pain in Mazar.
 
Grow your own marijuana: A FAQ on getting started


Once you’ve exhausted the jokes about green thumbs, red eyes and the hilarity of growing weed instead of blooms, the questions remain about how to go about growing your own marijuana, if you want to.

Amendment 64 allows home cultivation of marijuana, up to six plants per adult. (Denver’s rules allow a household of two or more adults to cultivate a total of a dozen cannabis plants.) That’s going to appeal to those partakers who are old enough to be leery about openly buying a substance that still remains, on the federal level, strictly illegal.

And it’s going to appeal to many who live in a Colorado town or county that doesn’t allow retail stores — and there are quite a few of those, especially on the Eastern Plains. Even within the county of Denver, the retail marijuana scene is a confusing patchwork: Legal in Glendale, but not in Englewood, but legal in Denver.

Even in jurisdictions that don’t allow retail marijuana shops, it’s legal to grow your own on your own property, within the specifications of Amendment 64.

But for home growers, there’s been the problem of where to acquire seeds or cuttings. Unless they received it as a gift, they couldn’t obtain cannabis plant material without risking a step on the wrong side of the law. That changes on Jan. 1 when retail marijuana shops will open and can legally sell plants and seed.

Still, it’s not like home growers can call a Colorado State University extension agent for growing advice; those experts are prohibited from answering any questions related to marijuana. Even though Amendment 64 specifically allows advice on growing marijuana, greenhouse and nursery staff often shy away from the subject.

“It’s crazy,” said Sharon Harris, executive director of the Colorado Nursery and Greenhouse Association.

“We started getting those calls when the bill first passed for medical marijuana, and our attorney advised us not to talk about it. It’s legal in Colorado, but still a federal offense. We’re waiting to see how the legal retail sales work out, but our position will not change until the U.S. attorney general says, ‘OK, here’s the deal.’ It’s quite a quagmire.”

So don’t expect help from the usual horticultural resources. Instead, look at hydroponic indoor gardening retail outlets, and start-ups like Cannabis University, which offers a $250 one-day class in possessing and growing marijuana.

Be advised: Under the law, growing your own marijuana requires keeping your plants in an “enclosed, locked space” that is not open or public. That’s pretty broadly-written, but a safe interpretation would mean a basement room or closet that can be locked.

No more than three of your plants can be in the flowering stage at one time. And it remains illegal to sell marijuana you grow.

To answer basic questions for novice pot-growers (potters?), we interviewed George Archambault, owner of MileHydro; Ben Holmes of Centennial Seeds; and Michelle LaMay of Cannabis University.

Q: What will I need to start growing weed?

Holmes: The basics are one container per plant; potting soil; fertilizer; a good-quality grow light; and seeds.

Archambault: Ideally, you’ll have a controlled environment, with fresh air coming in through a ventilation system and exhaust air going out the opposite end of the room, because plants don’t do well in stagnant air. If you use a controlled environment like a tent or cabinet, you’ll want a thermostat to make sure the room stays at the same temperature instead of getting too hot.

LaMay: A grow light with a vegging bulb and flowering bulb, a controlled environment, like a room or a tent; nutrient supplements; an outside air source; a carbon filter; a thermometer; an oscillating fan to move the air about; a can fan to pull air out through the carbon filter; timers; a PH tester for the water; a five-gallon water container; pots; growing medium; tarps for the floor, even with a grow tent; and only highest-quality extension cords, if you must use extension cords at all.

Q: So what’ll that cost?

Holmes: For a very basic set-up, around $500. Figure $20 for the containers, $40 or so for the soil, another $40 for the fertilizer and nutrients, $300 for a decent grow light, another $100 for a vegging bulb and a flowering bulb. Figure on spending $5 to $10 per seed, but prices vary widely. Some seeds cost $1,000 apiece.

Archambault: Five hundred is cutting a lot of corners. I’d say more like $1,000.

Q: Does it make more sense to try to grow hydroponically?

Archambault: I don’t advise new growers to start right in with hydroponics. That means spending at least $1,000 on equipment, and that’s a lot for a beginner. And you’re out all that money if you’re not successful.

Q: How much space would a $500 dirt set-up require?

Holmes: That’d be for a 4-by-4-foot area, so you’ll need only one grow light, plus one grow light with a white-blue vegging light bulb and an orange-red flowering light bulb.

Q: What’s a “vegging light bulb”?

Holmes: In indoor gardens, you mimic the spring and summer growing period with a light that’s on the white/blue spectrum. In the vegging state, you’re encouraging the plant to produce leaves, with a goal of growing the plant to half the size you want it to be when you harvest it. The rule of thumb is giving the plant 18 hours of light in the vegging (short for vegetative growth) stage. So if you want a 3-foot-tall plant at the harvest stage, you want to veg it until the plant is a foot and a half tall.

Q: Then what?

Holmes: When it reaches half the size you want it to be, then you have to trick it into flowering by making the plant think it’s fall. The flower is what people want from a marijuana plant, because you harvest the flower buds. So then you switch to the orange-red light bulb. That makes the plant think it’s fall, and it will induce flowering. During the flowering stage, you’ll want to give it 12 hours of light on, and rest it in the dark for 12 hours.

Q: That sounds like a ton of work. Is it easier to start with cuttings?

LaMay: Cuttings are easily accessible from friends or the medical marijuana dispensary or, soon, the retail store. They are about $10 each. They must be quarantined and doused aggressively with organic neem oil over 20 days.

Archambault: Start from seeds. I’ve never met anyone who bought a clone from a dispensary that wasn’t infested with spider mites or powdery mildew. It’s an indoor growing issue. The worst thing you can do is buy a plant that has a lot of insects.

Holmes: No! Start with seeds. We urge people not to buy cuttings, and my dispensary clients will hate me for saying that, but the worst thing you can do is buy their cuttings because they’re infested.

Q: Where can I buy seeds?

Archambault: After Jan.1, 2014, you can buy cannabis seeds in Colorado without a medical marijuana card. Seeds, and cuttings, will be sold at state-licensed marijuana retail stores. But remember, you can’t tell whether a seed is male or female. You have to wait until it germinates. It takes about a month to see the telltale signs of the first budding flowers. The males only grow leaves.

Q: Why does it matter whether the seed is male or female?

Holmes: Only the female seeds produce flowers, which is the crop you want. Some companies sell what they call “feminized seeds” that have a higher probability of being female. But regularly-bred seeds is what we recommend.

Q: Is growing marijuana comparable to starting tomatoes or other garden plants?

Holmes: Yes, it’s like growing a tomato. Marijuana is a plant that’s very sensitive to over-feeding. You need to lime the soil, because they don’t like acid soil. And I just use Miracle-Gro. I use that on everything. If you ate my tomatoes or zucchini, or smoked my weed, you’d come back for more. You don’t need to buy a lot of supplements and amendments and products. You need a bucket of dirt and a well-thought-out fertilizer plan, not 20 different fertilizers and nutrients. The best thing is to keep it simple.

Q: I have relatives who live in states that haven’t legalized marijuana. Will they be able to tell I’m growing it?

Archambault: Well, the plants are still going to release that telltale aroma. Hydroponic stores sell odor mitigation systems. Carbon filters are the most effective. If your grow system is in a basement room that nobody uses, maybe they won’t notice.

Q: What about pets?

Holmes: Cats will be kind of curious. Pets are disease-carriers, and your pet could infect your plants. Make your grow room off-limits to your pets.
 
10 Tips for Growing Eco-Friendly Cannabis Complied by the Organic Cannabis Association

1. NURTURE YOUR SOIL To grow high-quality cannabis, you’ll need highquality soil, so the first step is to get a test from a local soil lab, which will give you a better understanding of the physical and chemical characteristics of your soil. If you’re growing hydroponically, seek out the best medium for your system, such as buffered coir mixed with perlite, which is affordable and sustainable and offers excellent retention of water, air and nutrients.

2. CUSTOMIZE YOUR FEEDING REGIMEN Depending on their strain, size and stage of life, cannabis plants demand different nutrients. Fertilize precisely and dynamically, since nutrient needs increase and change throughout the plant’s life cycle. Organic nutrients become available to plants primarily through microbial breakdown, a living process influenced by fertilizer type, moisture, temperature and time. Understanding this evolving dynamic and the specific needs of your chosen strains will take practice, but the results are well worth the effort.

3. WATER THOUGHTFULLY Much like the fertilizer regimen, your watering needs change as your plants grow and the seasons progress. Protect your plants with an excellent irrigation schedule and/or system. This is essential to maintaining enough water in your medium so that plants don’t have to work too hard to meet their transpiration needs, while also providing enough air to the roots and enough soil microbes to keep plants thriving. Water frequently and shallowly when plants are just transplanted. Increase the irrigation amounts but decrease frequency once your plants are established, allowing for healthy root development and growth.

4. CONTROL YOUR CLIMATE Essential to keeping plants happy and healthy, precise climate control avoids stressing plants with excessive heat, cold, humidity or dryness. Climate control also contributes to pest management by preventing powdery mildew. Keeping relative humidity under 90 percent and having constant airflow throughout the plant canopy will help you avoid the dreaded PM without running your systems too hot and dry, which can encourage spider mite problems. (Growroom temperatures above 80°F with relative humidity below 40 percent create the perfect environment for spider mites.)

5. KEEP IT CLEAN Organic plant management requires making sanitation one of your highest priorities. Clean up and dispose of any pruned or discarded plant material as soon as possible to prevent infestations of pathogens or insects. Always wear clean clothes when you’re working in your garden, especially after handling infested material or visiting other gardens. Thoroughly deep-clean your grow area after each harvest to break the cycle of insects or pathogens. Designing systems with sanitation in mind will ensure that everything can be easily cleaned and kept sanitary.

6. KNOW YOUR STRAINS Intimate knowledge of the strains you’re growing will help you recognize problems before they turn into major outbreaks. In organic systems, it’s much easier to catch a problem early and address it than trying to reverse an out-of-control infestation or disease. Plants give hints that something is wrong, such as curled or discolored leaves. Pay attention and learn what thriving plants look like, so you’ll know when something isn’t right.

7. PRACTICE INTEGRATED PEST MANAGEMENT Integrated pest management (IPM) works hand in hand with nature and requires understanding plants, pests and pathogens. A robust scouting program involves looking for problems in the garden every day. Look under leaves and in every nook and cranny to catch pests early. If you find one, it’s important to accurately identify the pest before finding the least toxic product available to resolve the problem. Use all pest-control products correctly and responsibly. Just because a product is organic doesn’t mean it’s safe, so read, understand and follow the label. IPM also involves evaluating systems, understanding why you had a problem, and changing the way you grow so that problems don’t happen again.

8. USE FRESH, CLEAN AIR Filtering your intake air greatly helps to prevent pests and pathogens from entering your growroom. With many different filter types and sizes on the market, be sure you’re getting the right one for your system. Regularly clean, maintain and replace your filters so that this equipment doesn’t harbor insects or pathogens as well.

9. CONSULT ORGANIC-MATERIALS LISTS Both the Organic Materials Review Institute (OMRI) and the Washington Department of Agriculture (WSDA) review products to determine if they’re suitable for organic growing. Check online to see if the product you want to use has been reviewed and approved for use in organic operations, but be careful: Some products have been approved for uses that have nothing to do with plant cultivation. (For example, some products are approved as an animal feed but not as a plant fertilizer, so read carefully.) Also, just because a product hasn’t been approved by OMRI or WSDA, it doesn’t mean it’s prohibited in organic production; it can also mean that the manufacturer didn’t pay to have its product reviewed. Overall, consulting the OMRI and WSDA lists can help you find organic products, but neither one is an exhaustive list of all the options available.

10. WRITE NOTES! Recordkeeping is necessary if you wish to systematically improve your process. You won’t remember without writing it down, because there are so many variables to keep track of when growing cannabis. Keep a written record of everything you do in order to look back and diagnose how problems started. Detailed records also help when trying out new products or techniques and evaluating the results. Your trusty notebook or spreadsheets will be your best tool for becoming a better grower. m
 
The Civil asset forfeiture was devised to fight drug kingpins, but soon became a handy way for the police to rob Americans


The War on Drugs has produced countless examples of injustice and cruelty being perpetrated against nonviolent drug users. One of them is civil asset forfeiture. The seizure of property has always existed in the US, but it usually involved police agencies impounding ill-gotten gains either under criminal law—a guy buys a car with a fraudulent check, say, then gets busted, convicted and loses the car—or administrative forfeiture (as when drugs are found and no one steps forward to claim them).

But all that changed when Congress passed the Comprehensive Crime Control Act of 1984, which authorized the seizure of property under civil law—in which the standards of proof are much lower and the constitutional protections that exist for criminal proceedings do not apply—and allowed the proceeds from such “forfeited” items (including cash) to be divvied up among the police and prosecuting agencies involved. Most states immediately followed suit with similar laws, changing the priorities of police agencies from crime fighting to revenue production.

The law was theoretically intended to go after drug kingpins and their assets, but in fact it was mostly used against small-time pot growers and dealers, who had their homes, cars and bank accounts seized. By 1990, civil asset forfeiture had become a billion-dollar-a-year industry. Tellingly, few of the people who had their property seized were actually charged with any crime. Instead, only their property was “arrested”—and under civil law, it was considered guilty until proven innocent.

Moreover, unlike people, property isn’t guaranteed a trial, nor is it entitled to a lawyer. Few people fought these seizures because they stood little chance of winning. The horror stories came in an endless, numbing stream: families tossed into the street when their homes were seized, innocent people terrorized or even shot to death during police raids.

The seizures themselves were often wildly arbitrary. Maybe you lent your car to a friend and he got busted with a joint while driving it. Guess what? You just lost the car. And the money from those forfeitures? It went into things like guaranteed police overtime or new station houses— or it simply went missing. By the mid-1990s, law-enforcement agencies couldn’t account for the whereabouts of hundreds of millions of dollars they had seized.

Fortunately, after a mounting outcry, Congress passed the Civil Asset Forfeiture Reform Act in 2000, which puts the onus on the government to prove that the property was somehow involved in a crime, rather than the owner having to prove its “innocence.” Although it hasn’t stop the seizures entirely, it did severely curtail them.
 
Pot by the Numbers
If you don’t think we’re making progress, think again! Here’s a quantitative look at how far we’ve come— and also how far we have to go

There are 40 million cannabis consumers in the United States; six to eight million regularly purchase the herb. There are over 150 NORML chapters in the United States and around the world. NORML has more than 520,000 Facebook friends and 130,000 Twitter followers. In the US, 22 states and the District of Columbia have passed either voter initiatives or legislation creating legal protections—and, in some states, retail access—for medical cannabis products. 16 states have decriminalized the possession of cannabis for adults over 18 years of age. Two states have legalized cannabis production and retail sales for recreational use. In 2008, there were zero state legalization bills introduced. So far in 2014, there have been 15. The total number of cannabis-law reform bills introduced in Congress in 2008: one. The total number of bills introduced so far this year: eight (including for legalization). There are 1.2 million registered patients compliant with state medical cannabis laws in the United States.

This registration data suggests that as many as 90 percent of these patients are males under 30 years of age claiming chronic pain as the qualifying medical condition. There are 120,000 medical patients registered at the San Francisco Bay Area dispensary Harborside Health Center. There are 200 registered patients being served by the three legal dispensaries in Washington, DC. There are four remaining federally registered medical cannabis patients in the United States. They were grandfathered into the Compassionate Investigational New Drug program and receive 300 prerolled joints a month, free of charge.

In 2009, High Times held one Cannabis Cup event per year … in Europe. In 2014, there will be six—including five in the US. Over $3 million in retail taxes was collected in the first 30 days of legal “pot shops” opening in Colorado this year. In 2010, there were four registered marijuana lobbyists on Capitol Hill. Today, there are over 20 pro-marijuana lobbyists working for various organizations, trade associations and companies. There are 2,800 cannabisrelated businesses in the United States, with over 5,000 more applications pending in Washington and Colorado. In 2009, there was one publicly traded cannabis-related company. In 2014, there are over 25.

In 2010, there were zero cannabis-centric private equity funds to invest in. In 2014, there are five. In 2014, NORML will give over 2,000 media interviews about cannabis-related matters. There have been 24 million pot arrests in America since cannabis was made illegal back in 1937 (90 percent for possession only). There were 750,000 arrests in 2012 alone. An estimated 60,000 to 100,000 cannabis cultivators, traffickers, sellers and consumers are currently incarcerated in America on cannabisrelated crimes—a number of them with life sentences. There are over 600 lawyers involved with NORML, defending victims of prohibition laws, helping start legal cannabusinesses and litigating in court. There’s been a 94 percent drop in cannabis-related arrests in Colorado since legalization took effect in December 2012. m
 
Jontae_James.jpg
Jontae James
NatureTrak Creator on Fighting Stigma and Racial Disparity in Cannabis Industry

NatureTrak founder Jontae James was 13 years old when his father was arrested for intent to sell cannabis — it was 1994, and the war on drugs was in full effect.

Flash forward to current day: James, despite — or perhaps because of — the negative experience with cannabis at such a young age, is not only a part of the cannabis industry as an adult, but he’s making his mark.

“I’m an ’80s baby, so I grew up with a heavy influence from D.A.R.E. and marijuana being bad,” James explains. “If you used marijuana, you were bad and wouldn’t amount to anything. I did everything I could to not be a statistic. I had friends and family that were involved in different forms, but I was very much a square when it came to cannabis.

“It was a tough time for me,” James says of the period surrounding his father’s arrest. “If anything, that kept me from ever entering the industry; but now, it’s a driving force for me to push the industry to new heights.”

It’s no secret that the war on drugs has disproportionately impacted people of color in a negative way, particularly in the black community. Black people make up around 13 percent of the US population, and studies show they use drugs at the same rate as other races, yet they comprise 29 percent of all drug-related arrests, and nearly 40 percent of those currently incarcerated for drug related offenses. The racial bias that infiltrated the war on drugs has impacted families of color for generations, and its effects are still lingering.

“People who were selling to help feed their families were [seen as] the scum of society and were ripped from their families,” James says. “That stigma impacted tens of thousands of lives. I know how my perception of cannabis was growing up, and I ruined personal relationships because of what is now self medication for anxiety and pain.”

It was this shift in perspective and understanding that caused James to want to dip his toe into the burgeoning legal cannabis industry.

“I want to not only change the narrative of what being black in cannabis means, but to be a part of the solution of repairing the damage done to individuals throughout the years,” he says.

James got his start in the industry about five years ago. At the time, he was working for a boutique venture capitalist in Silicon Valley when Ron Brandon (James’s current business partner and chief of staff) was looking for help funding a cultivation project. James had access to investors and was able to take a first-hand look at Brandon’s operations.

“I quickly saw the gaps in the regulation, and knew there was a big opportunity for a technology perspective if this would be legal in California,” he explains.

James then built Bluntli, his first cannabis-related tech company. It was a license verification platform for businesses and patients, but James knew that as the regulations increased, “Bluntli wouldn’t be a strong enough form of compliance for the legal market.”

He and his team built an entirely new tracking system for cannabis that eventually became NatureTrak.

“I used my background in Enterprise SaaS [Software as a Service] sales and program management to make critical decisions at the beginning, which led to NatureTrak being in the position it is today,” James explains. “Track and Trace software is not revolutionary. Other industries track and trace as well, and knowing that and seeing the players in the industry, I felt that there needed to be a better solution — more cost effective, and more importantly, a system that helped the disadvantaged individuals get a jump start toward having a legal cannabis business.”

Phone-1-TNT-a-1024x768.jpg

NatureTrak in action

High compliance costs set by state or local governments are de rigueur in the cannabis industry, and James didn’t want to be another obstacle for marginalized folks who want to enter the industry.

“Just think of all the software you use daily that you do not have to pay for,” James says. “Now think of the software you do have to pay for. Then take it one step further: Imagine the amount of taxes forced on the industry, because clearly every business is making tens of millions of dollars. NatureTrak is my way of giving back and pushing the industry together legally.”

Because he lives it, James understands the various hardships for entrepreneurs of color in the industry.

“Fundraising is always the biggest hurdle for a few reasons,” he explains. “It’s cannabis, and a good amount of the investors are still gun shy to enter the industry. Being a black tech founder — and in the cannabis industry — adds additional objections to overcome.”

Attorney Emily Burns, who specializes in cannabis-related law, has seen first-hand these objections when it comes to some of her clients.

“Stereotypes and stigmas remain a significant obstacle for minorities looking to enter the industry, regardless of the level of funding provided to advance social equity programs,” she says. “I have talked to many individuals, including many of my own clients, who are reluctant to come out publicly regarding their interest in the cannabis industry because of the stigma that persists among friends, family members, religious leaders and politicians.

“Everyone in the industry talks about advancing social equity in the industry through state-sponsored legislation, but these initiatives are not effective unless individuals feel comfortable participating in the industry.”

Some states that have legalized cannabis are taking on these issues and delving into the very real racial consequences of the war on drugs. When it comes to the state making the most strides, Burns says that Maryland is one to watch.

“Maryland lawmakers have addressed better than any other state the impact of prior convictions, specifically felony drug offenses, on the ability of individuals to apply for licenses and/or obtain employment from a licensed facility,” she says. “Individuals with prior misdemeanor drug offenses can still become an owner, investor, manager and/or employee of a medical cannabis licensee, and individuals with felony drug convictions can do the same if they have satisfied the terms of their sentence at least seven years prior to becoming an owner, investor, manager and/or employee of a medical cannabis licensee.”

Burns says that it’s important for state programs to “emphasize and reward diversity with respect to ownership and investment, as opposed to mere employment or contracting opportunities.” It’s not enough for companies to have diverse employees, but to show true diversity — various races and ethnicities, socioeconomic backgrounds and genders — in management, ownership and investors. “I think the private market can, should and will play a significant role when it comes to diversity and inclusion in the industry,” Burns says.

And that’s just what James hopes to do with his company.

“NatureTrak’s mission is to ‘keep California cannabis Californian.’ The war on drugs, the incarcerations, being black in cannabis, lack of resources… NatureTrak represents it all through our software,” he says.

For James, it’s more than just talking points — it’s creating the sort of company and system that happens when everyone gets a chance to sit at the table. It’s not about lip service, but about actually doing the right thing and giving back.
 
five-organizations-fighting-the-war-on-drugs.jpg

Organizations Fighting To End The War On Weed And Racial Inequality In The Cannabis Community

Historically, anti-cannabis campaigns have targeted people of color. Nearly a hundred years ago, prohibition was racialized initially against Mexican immigrants, following the Mexican Revolution of 1910 when a wave of newcomers headed north and cannabis became associated with Hispanic migrants.

Despite claims these immigrants “introduced” the plant to the United States, there were many people — including colonizers like Thomas Jefferson and George Washington, who manufactured and profited off industrial hemp — who were already decidedly familiar with cannabis and intimate with its many uses.

As the Great Depression approached, fear-mongering propaganda also targeted African American men, perpetuating the racist myth that black men rape white women under the influence of cannabis.

According to the Drug Policy Alliance:

During hearings on marijuana law in the 1930’s, claims were made about marijuana’s ability to cause men of color to become violent and solicit sex from white women. This imagery became the backdrop for the Marijuana Tax Act of 1937 which effectively banned its use and sales.

Decades later, in 1970, the Nixon administration adopted the Comprehensive Drug Abuse Prevention and Control Act, which was later renamed the Controlled Substances Act. The Drug Enforcement Agency was formed a short time later, in 1973.

The spread of misinformation continued, even by the federal government. John Ehrlichman, who served as counsel and assistant for domestic affairs to President Nixon, admitted in a 1994 interview (that was later published by Harper’s Magazine in 2016) that the administration fabricated the drug war:

“The Nixon campaign in 1968, and the Nixon White House after that, had two enemies: the antiwar left and black people. … We knew we couldn’t make it illegal to be either against the war or black, but by getting the public to associate the hippies with marijuana and blacks with heroin, and then criminalizing both heavily, we could disrupt those communities. We could arrest their leaders, raid their homes, break up their meetings, and vilify them night after night on the evening news. Did we know we were lying about the drugs? Of course we did.”

In 1986, President Reagan signed the Anti-Drug Abuse Act, which appropriated an additional $1.7 billion to fund the drug war at home and abroad. The former president says he passed the legislation in honor of his wife Nancy, who for years peddled the “Just Say No” campaign.

By this point, black women faced criminalization as a result of the “crack baby” myth — that black mothers were using crack while pregnant and thus caused their infants to become dependent on the drug, a claim that was later debunked.

The drug war never went away, but has certainly been revived by Attorney General Jeff Sessions to target people of color in the United States. Here are just a few organizations you can support who are already engaging with this work.

The Hood Incubator
The Hood Incubator hopes to increase black and brown participation in the cannabis industry through community organizing, policy advocacy and economic development.

Based in Oakland, California, each year the organization hosts a business accelerator program to provide startups with technical assistance, business education, access to cannabis industry resources, and mentorship.

During the organization’s first year of operation in 2017, staff graduated 10 startups from its accelerator program, hosted a Business Pitch Day with over 150 attendees, and played a critical role in Oakland’s Equity Permit Program. Additionally, The Hood Incubator facilitates an apprenticeship program for those individuals wanting to become immersed in the industry. Although its headquarters are based in the Bay Area, anyone from its targeted demographic is encouraged to get involved.

The Hood Incubator is currently seeking sponsorships to fund its incubation model. Membership to the organization is free.

Drug Policy Alliance
The Drug Policy Alliance was formed in 2000 from a merger between the Drug Policy Foundation and the Lindesmith Center.

While many folks were initially involved with cannabis reform, the organization doesn’t only advocate for legalization of the plant. Rather, it also acts on behalf other drug policy reforms, because the war on drugs of course isn’t exclusive to marijuana.

In addition to gathering data and publishing informative reports regarding the war on drugs, according to its website, the DPA wants to reduce the criminalization of drug policy, promote a harm reductionist and health-centered approach to policy, and empower youth (as well as parents and educators) “with honest, reality-based drug education that moves beyond inaccurate, fear-based messages and zero-tolerance policies.”

The DPA has several action alerts asking advocates to contact their elected officials about drug legislation, and also organizes events all over the country. It also accepts direct donations and maintains an online store to raise additional funds.

Marijuana Policy Project
The Marijuana Policy Project initially targeted medical cannabis legislation in US states considering such policies, but has also advocated to replace prohibition with regulation and control.

Shortly after forming in January of 1995, MMP experienced its first victory that April after influencing the US Sentencing Commission to amend the federal sentencing guidelines and therefore establish shorter prison terms for people convicted of cannabis cultivation. Ever since, the organization has tackled state and federal policies through economic and criminal justice measures, and fought issues including racist policing, DUI laws, record expungement and mass incarceration.

MMP encourages supporters to take action by contacting their local legislators, working with city council, writing letters to the editor in favor of drug reform, calling into radio and television shows also in favor of reform, and distributing the organization’s literature. You can also sign up to become a dues-paying member.

NORML
NORML, otherwise known as the National Organization for the Reform of Marijuana Laws, is one of the most popular cannabis advocacy organizations in the entire county, headquartered in Washington, DC.

Founded in 1970, the group has been vocal about the interests of cannabis consumers through government lobbying in favor of reform; regularly speaks in the media to undo the myths perpetuated by decades of Reefer Madness-era propaganda; publishes its own research and resources, including a regular newsletter; and organizes countless conferences and events.

Chapters of NORML are found in most major cities. There are also college chapters, where many young cannabis advocates (such as myself) have kick-started their journeys into drug policy. Additionally, you can support the organization by volunteering on its legal committee or by donating directly.

Students For Sensible Drug Policy
Students for Sensible Drug Policy, or SSDP for short, formed out of the Rochester Cannabis Coalition (RCC) at the Rochester Institute of Technology. On October 1, 1998, members of the Rochester Cannabis Coalition renamed themselves Students for Sensible Drug Policy.

In 2000, the organization began protesting the Higher Education Act Aid Elimination Penalty, which excluded students with prior drug convictions from receiving financial aid. These efforts led to a partial repeal; now, the legislation only affects those who have been convicted of drugs while enrolled in school (which, of course, is still an injustice).

Twenty years later, there are chapters of the SSDP all over the United States, in addition to international chapters in the likes of China, Germany and Pakistan. The organization currently has several campaigns targeted at educational institutions to reform campus guidelines around the Good Samaritan policy (whereby students are encouraged to alert authorities during a drug or alcohol medical emergency to encourage a potentially lifesaving response, free from fear of a disciplinary blowback), drug testing and more.

SSDP also has a peer “Just Say Know” education program, advocating students to start honest conversations about drug use and culture with the end goal of harm reduction. While SSDP of course targets students to organize, it also accepts donations and has an online store.
 
how-to-make-your-own-at-home-cannabis-vaping-oil.jpg

DIY Cannabis Concentrates: A Hobby With A Heck Of A High

Vape pens that contain oil cartridges are becoming increasingly popular, and it’s understandable as to why. One cartridge lasts a good amount of time, you don’t need to refill after each use, they’re compact, discreet and easy to use. There are a ton of different brands and varieties on the market, some being made with carbon dioxide cannabis extracts and others with distillates, and you can also find a variety of strains and potencies at any dispensary.

I’ve always been a do-it-yourself kind of gal, making my own homemade soaps, scrubs and lip balms. Plus, I love trying out new recipes, even if the end result isn’t always Top Chef worthy. With this DIY spirit in mind, I wanted to try my hand at homemade vaping oil. While I try to stick to vaping as it’s gentler on my lungs, I usually use the flower we grow at home, or I end up purchasing oil cartridges. Doing this regularly made me wonder just how tricky it is to make your own vape oil in your kitchen. Turns out, it’s not really that difficult at all!

I ended up going with a vape oil recipe that requires some form of slow cooker for two reasons. One, I already had a Magical Butter machine and was eager to test it out with vaping liquids, and two, it truly was a very “set it and forget it” adventure. The Magical Butter maker is basically a specialized slow cooker (with an internalized stirrer) that works particularly well for creating cannabis concoctions. While I highly recommend checking them out, you could also use any type of slow cooker or Instant Pot where you can set exact temperatures.

In addition, there are a variety of other methods one can use at home, from a process that utilizes high-proof alcohol, to one using resin, parchment paper and a hair straightener. Which method you use depends on what you have access to and your thoughts on various additives. Going the DIY route allows you to be selective in how your vape oil is created. Polyethylene glycol, a solvent found in many commercial vape oils, has been known to break down into carcinogenic compounds at extremely high temperatures, so folks may want to avoid it.

Being choosy about what goes into your mix is one of the benefits of the DIY process. I spoke more about this with Chris Whitener, executive director at MagicalButter.com. “Nowadays, consumers are more conscious of what they are inhaling and ingesting, but the only certainty is growing your own and using your own plant matter to make oils,” says Whitener. “There are several methods for infusing vegetable glycerin slow and low in the MB2e. You can also create a fully extracted cannabis oil [FECO] by creating an alcohol tincture and evaporating all of the alcohol. For the best results, press your own rosin, using squashed cannabis buds in the MB2e to make topical and edible oils, and use the rosin to make your own vape liquid.”

The fact that there are many different ways to make these oils is an exciting part of doing it yourself. It allows you to find the best mixture and potency that works for you and your endocannabinoid system. I’ll be honest, I started with this method because of the previously mentioned ease, but also because it’s an inexpensive way to run some trial and errors. Thankfully, now you can learn from my mistakes.

vegetable_glycerin_cannabis-1024x809.jpg

To make your own at-home vape oil, you’ll need vegetable glycerin and half an ounce of bud.

Homemade Vape Oil Recipe
Ingredients
  • 1/2 ounce of cannabis
  • 16 ounces of vegetable glycerin (about 2 cups)
  • 2–4 ounces of propylene glycol
Method
  1. Gather up your cannabis. I chose a recently harvested Sour Diesel. As someone who uses cannabis medically to combat anxiety, it’s one of my favorite strains that allows me to function normally without the physical and mental impact of anxiety or panic.
  2. Decarboxylation. This first step is probably one of the most important parts of the process. Decarbing your cannabis activates the non-psychoactive THCA (tetrahydrocannabinolic acid) in the raw buds, turning it into psychoactive THC. Basically, you’re warming up your cannabis low and slow to allow that awesome THC to power up its potency. Toast your buds at 250 degrees Fahrenheit for 20 to 30 minutes. You want them to be lightly browned, and nice and dry. You can grind the cannabis up before doing so, but you don’t really have to if you’re feeling lazy, as decarbed cannabis should essentially flake to the touch, breaking apart easily on its own. Allow it to cool before you continue.


    toasting_your_cannabis_bud-1024x768.jpg

    The length of time you toast your buds will impact the flavor of your oil.

  3. Mix together cannabis and vegetable glycerin. Take your decarbed cannabis and place it in your machine. Add 8 ounces of food-grade vegetable glycerin. You’re making something that will go into your body, after all, so you want to get the safest, cleanest version there is. Then slowly add the second 8 ounces of vegetable glycerin.
  4. Set it and forget it! One of the reasons I so happily used the Magical Butter machine is because you literally can set it and forget it as you would with a slow cooker. I allowed my mixture to cook at 160 degrees F for eight hours. The machine has a mechanism that self stirs every so often, helping the glycerin absorb the THC. If you’re using a crockpot, you will want to stir occasionally.
  5. Strain it out. Once your mixture has cooked and cooled, it’s time to strain. The glycerin is nice and potent, but it also has a ton of flower swimming around in it. My Magical Butter came with a cool mesh sieve that I used to strain out the liquid from the flower, but a good-quality cheesecloth will do in a pinch. Because of the toastiness of my cannabis and the length of my cooking time, my liquid ended up being a darker brown with a deeper flavor. You can play around with both those elements, depending on temperature and length of the decarb, and the processes of cooking with liquid.


    making_cannabis_concentrate-1024x885.jpg

    Once your mixture has cooked and cooled, it’s time to strain.

  6. Mix with thinning agent. Now you need to decide if it’s the right consistency. If your mixture is too viscous, it can clog up your cartridges, making vaping a difficult task. This is where this method can become tricky. My vegetable glycerin concoction was actually fairly thin, so I didn’t have to cut it all that much, but I did use about an ounce of food-grade propylene glycol, an ingredient that may give off carcinogenic compounds at large amounts under excessive heat. I decided to take a small risk for the sake of this attempt, but obviously, use ingredients that you feel comfortable with.
  7. Fill cartridge. Using an adorable little pipette, I filled an Ultraflo X-Pro refillable cartridge. Attach to almost any battery and you’re good to go. One day of very little work and you’ve got your own homemade vape oil!
  8. Enjoy!
filling_your_vape_cartridge-1024x768.jpg

Using a pipette to ensure less oil spillage, fill your Ultraflo X-Pro refillable cartridge.


bbm-02-21-2017-resized.jpg
Purple stems on Why Do My Marijuana Plants Have Purple Stems, Stalks, Petioles?

Most cannabis growers worry if we see purple stems, stalks, and petioles on our marijuana plants.

The color of leaves, stems, stalks, and petioles are a big part of our marijuana plant’s language as it tries to tell us if it’s happy or suffering.

Purple stems may be telling you that your plants will grow slower, buds will form slowly, buds will be smaller and less developed.

Purple stems, stalks, and petioles may be a warning sign of problems with nutrients, root zone pH, plant health, or grow room environment.

A stressed cannabis plant will often have purple stems and other parts.

But… some marijuana strains are genetically programmed to have purple stalks, stems, petioles, and leaves.

Check out these beautiful purple marijuana strains, for example.

You can discover if the strain you’re growing is genetically programmed to be purple by looking at strain descriptions, photos, and YouTube videos… and by asking the strain’s breeder.

If your grow op has multiple strains all fed and lit the same way but only one strain is going purple, and if the purple strain is growing as well as all the other strains, you’ve probably got nothing to worry about.

However if you’re growing multiple strains andmost or all plants have purple stems, petioles, and stalks, you’ve likely got problems to diagnose and fix, especially if the strains aren’t known to be purple strains.

The most common purple problems come from hydroponics nutrients disorders and root zone issues.

Phosphorus and magnesium lockout or deficiencies are at the top of the list.

(Read here about nutrients lockout).

Purple stems can also come from nitrogen or potassium deficiencies or lockouts.

Nutrients issues can be frustratingly complicated.

Please look at this series of articles giving you a scientific way of diagnosing and fixing nutrients problems.

Fixing magnesium deficiencies is easier than fixing phosphorus, nitrogen, or potassium problems.

You root or foliar feed Epsom salts at a rate of ¼ teaspoon of Epsom salts per gallon root feed or a 130 ppm foliar feed at 5.7 pH.

You can root feed Sensi Cal-Mag in grow phase and the first three weeks of bloom phase.

In bloom phase, root feed Bud Candy, Bud Factor X, and Microbial Munch (all three have magnesium).

Fixing phosphorus deficiency is challenging because there are few solo phosphorus supplements.

If I suspect phosphorus deficiency, I add B-52 in grow phase, and B-52 and Big Bud in bloom phase.

The B-52 provides added phosphorus, nitrogen, and potassium, along with B vitamins that help stressed plants.

B-vitamins also increase bud development.

Beware that most bloom boosters contain way too much phosphorus in relation to potassium.

Inferior hydroponics base nutrients and supplements can create lockout and deficiencies, as can incorrect root zone pH, bad water, overwatering, and overfeeding.

And if you routinely add a solo element like magnesium into your root zone, you may eventually create other problems, such as nutrients lockout.

Only feed materials such as Epsom salts for one or two watering cycles, then stop using that material, and see what happens.

If you’ve tried flushing, adding individual nutrient elements such as magnesium, eliminating grow room environmental problems, pests, and diseases, and you still have purple stems, petioles and other plant parts, watch your purpling plants closely.

If they’re purple but they’re otherwise growing well, no worries.

But if they’re growing slowly or not at all, if bud development is delayed and inadequate, if they’re not using much water or nutrients, this is most likely a sign of a defective strain.

This is especially verified if you’re growing other strains in the exact same environment and they’re doing great.

For example, I had a 3000-watt grow room with five different strains.

Four strains grew fine and yielded big.

One strain had purple stems starting three weeks into grow phase.

I couldn’t fix it.

Those plants grew slowly with weak stems and stalks.

They didn’t yield enough weight, even though the buds were potent.

I won’t grow that strain again!
 
Back
Top